Wednesday, August 30, 2006

Simple Summer Fare: Vegan Korean Banchan Dinner

We had hot weather last weekend, AGAIN! Aargh! Fall, please come quickly, I am ready for you! I decided to make a simple Korean meal so I don’t have to turn on the oven. I just boiled a few fresh vegetables and seasoned them. I also pan fried marinated Soycurls™. I served these with kim chee that I made a week before. BTW, these dishes can be served slightly warm or at a room temperature so they are great for a picnic or traveling. This kind of style where the dishes are served on small plates or amounts with rice are called Banchan.

The Koreans use a lot of sesame oil and sesame seeds in their seasonings. There is a Korean market within a walking distance from our house that sells lots of toasted sesame seeds and gallons of sesame oil. Sesame seeds and oil are healthy. If olive oil is heavily used in Italy and Mediterranean, sesame oil is the equivalent in Korea. Sesame seeds are a good source of calcium, copper, and full of Omega 6. Here is an article that describes all about it: Open Sesame!

Sesame seeds and oil are delicious! For those who have cooked with sesame oil, don’t you think so? I used brown and black sesame seeds on top of the steamed brown rice.
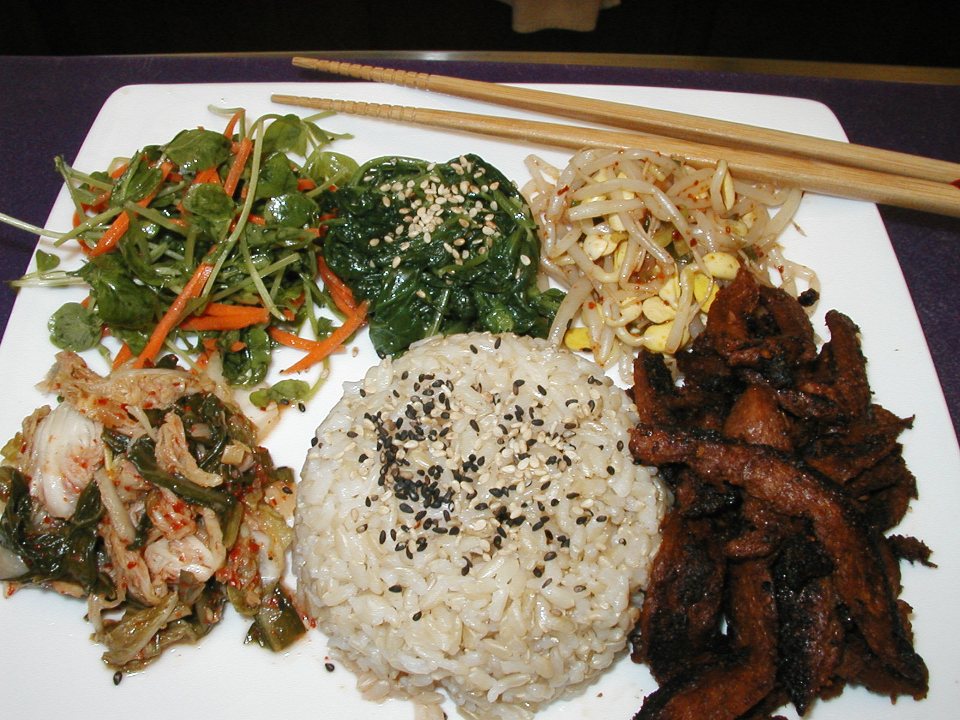
From the top (clockwise) I made Pea sprouts and Carrots salad, Seasoned Boiled Spinach, Seasoned Soybeans Sprouts, Spicy Gochujang Soycurls™ , Steamed Short Grain Brown Rice, and Homemade Kim Chee. DH loves the Seasoned Soybeans Sprouts very much. It is best to use fresh vegetables for this meal. We are lucky enough to live close to Asian markets that provide lots of fresh pea sprouts, beansprouts, spinach, and napa cabbage.


Gochujang is Korean Red Pepper and Bean Paste. I bought this at the Korean market and as far as I know only Korean market sells it. This paste is a condiment and a seasoning for cooking. The use of it is just like American ketchup but it is spicy and hot. Here is a picture of a tub of Gochujang that is commonly sold in the Korean market. I love the fermented taste (it is miso like), the spicy, and a bit sweet taste. I used Soycurls™ which seem to absorb gochujang and other the spices very well.

Now, about kim chee, for those who do not know what kim chee is, here is an info about kim chee. It is considered a national dish of Korea. It is a spicy, sour, and fermented napa cabbage spiced with Korean red pepper, salt, garlic, and ginger. Other kind of vegetables can be used also such as cucumber, green onions, Chinese mustard green, daikon, etc. The Korean market near our house is like a 'house of kim chee'. They sell all kinds of kim chee. However, I was told many times that there is shrimp paste or fish flavoring in store-bought kim chee that usually is not listed on the product label. I don’t know for sure whether this is true but I haven’t bought kim chee from a store for a long time. Julie Hasson provided me with her husband’s recipe of kim chee and I have made it several times at home. It is really good.

Printable Recipes

Pea Sprouts and Carrot Salad
Serve 4

2-3 cups fresh pea sprouts
1 cup grated and peeled carrots

Salad dressing:
½ cup seasoned rice vinegar
½ cup aji-mirin
1 tsp roasted sesame oil
1 tsp organic sugar

Mix pea sprouts, carrots, and ¼ cup salad dressing or more, just before serving. Save the rest of the salad dressing for next meals.


Seasoned Boiled Spinach
Serve 4

3 bundles fresh spinach, clean leaves and break off the roots
2-3 tsp sesame oil
2 tsp roasted sesame seeds
¾ tsp sea salt

Boil about 6-8 cups of water. Put fresh spinach leaves into the boiling water. Push them down until all covered and submerged in the water. Let it simmer for 2 minutes. Drain in a large colander and immediately rinse with cold water until the spinach is cool. This is to stop the cooking process and to sustain the fresh green color. Squeeze all the water out from the spinach. Combine spinach, sesame oil, sesame seeds, and salt in a bowl. Use a fork to break the spinach apart while pouring sesame oil and other ingredients.

Seasoned Soybean Sprouts
Serve 4

1 lb fresh soybean sprouts
1/2 cup thinly sliced scallions/green onions
2-3 tsp sesame oil
1 tsp Korean red pepper flakes
½ tsp sea salt

Boil 3-4 cups of water. Put fresh beansprouts into the boiling water. Push them down until all covered and submerged in the water. Let it simmer for 5 minutes. Drain in a colander and immediately rinse with cold water until the sprouts are cool. This is to stop the cooking process. Squeeze all the water out from the sprouts. Combine sprouts, scallions, sesame oil, Korean red pepper, and salt in a bowl.

Note about Korean red pepper or Kochu Garu: This kind of pepper can only be found in Korean market. This is different than the red pepper we put on pizzas or other dishes. I really don’t know the difference (maybe a different kind of chili pepper that grows in Korea?) but it is different. Those of you who knows about it please let me know.

Cucumber Pickles
Serve 4
On the side, I also served this cucumber pickles. It is refreshing.
2 Japanese/Korean cucumbers, sliced horizontally
2 Tbsp. seasoned rice vinegar
2 tsp organic sugar
1/2 tsp salt
1/2 tsp Korean red pepper flakes
Mix cucumber and all the ingredients together. Let it sit in the refrigerator until ready to be served.
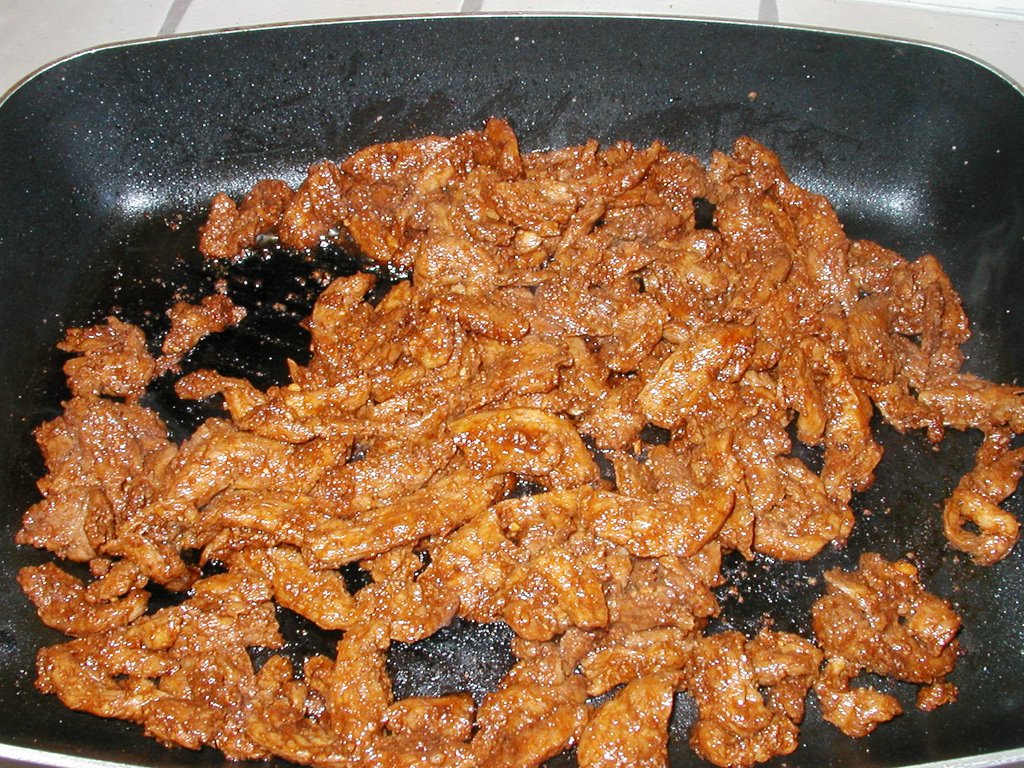

Spicy Gochujang Soycurls™
Serve 4

Marinade:
6 cloves garlic
1 inch fresh ginger or about 2 tsp grated ginger
3 tbsp dark mushroom soy sauce (you can use light soy sauce)
3 tbsp gochujang
1 tbsp aji-mirin
2 tbsp organic sugar
½ tsp freshly ground black pepper
2 tbsp ground sesame seeds (grind them in a small blender or coffee grinder)
2 tsp sesame oil

3 cups dry Soycurls™, reconstitute them in warm water as instructed on the package, then squeeze the water out

Put all the marinade ingredients in a small blender. Blend until smooth. Alternatively, you don’t have to use a blender, but you have to mince the garlic and ginger very fine. Mix all the marinade ingredients well. Marinade reconstituted Soycurls™ with the sauce for about 15 minutes.

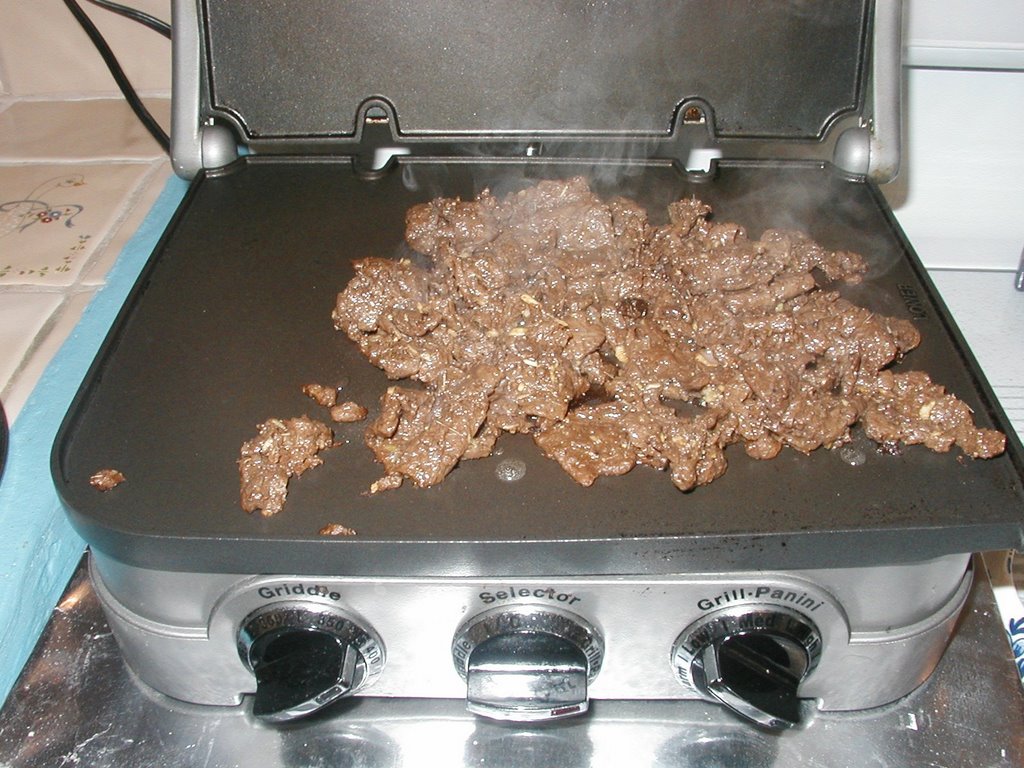
Just before serving, pan fry marinated Soycurls™ on a non-stick griddle or a cast iron frying pan until hot and a bit blackened. You can use canola oil spray from a can or 2 tsp or more of sesame oil to pan fry them.


Jay’s Kim Chee
Makes a lot, about 1 gallon I think

This is a great and quick kim chee recipe I received from Julie. You need to wait a while before you can enjoy it because you have to wait for the fermentation to take place. However, once it is done, you can enjoy it for weeks to come. Summer time is the best time to make kimchee because the weather is warm and the kim chee ferments quickly.

2 cups water
2 tbsp sweet rice flour *
2 medium heads napa cabbage, sliced into 1-inch or larger pieces
2 ½ tbsp kosher salt (see my note about Korean salt below) *
4 to 5 tbsp Korean hot red pepper flake (see my note about about Korean red pepper)*
¼ cup minced ginger
¼ cup minced garlic
½ cup thinly sliced scallions or green onions

In a saucepan, whisk together water and rice flour until smooth. Heat over medium heat, whisking continuously, until mixture thickens and starts to simmer. Remove from heat and let cool off a bit. Add pepper, whisking well.
In a very large bowl, add cabbage and sprinkle with salt, scallions, ginger and garlic, tossing to mix. Let sit for 5 to 10 minutes. Pour cooled sauce over cabbage, tossing well.
Let cabbage sit at a room temperature for a couple hours (you can refrigerate it right away, but the flavor is better if you let it sit out for a few hours first). Toss well and place in a large glass container and refrigerate.

* All of the ingredients are available at the Korean market

Tip:
I usually let it sit in a room temperature overnight in summer and 2 nights in winter. However, be prepared of the stinky fermentation smell, so put them in your garage or outside in the patio. I also have a refrigerator in my garage where I store my jars of kim chee.

Note about salt: Do not use iodized salt or table salt to make kim chee. The best kind is sea salt or kosher salt. I buy this kind of salt in Korean market. The fermentation of the cabbage is derived from the salt and its combination with garlic, ginger, and red pepper.
Here is an article about how it all work in cabbage fermentation: Cabbage Patch Chemistry
Here is an artilce about kim chee and more tips how to make it: Got the Hots for Kim Chee

Sunday, August 20, 2006

Sushi Party: Vegan Temaki and Inari Sushi


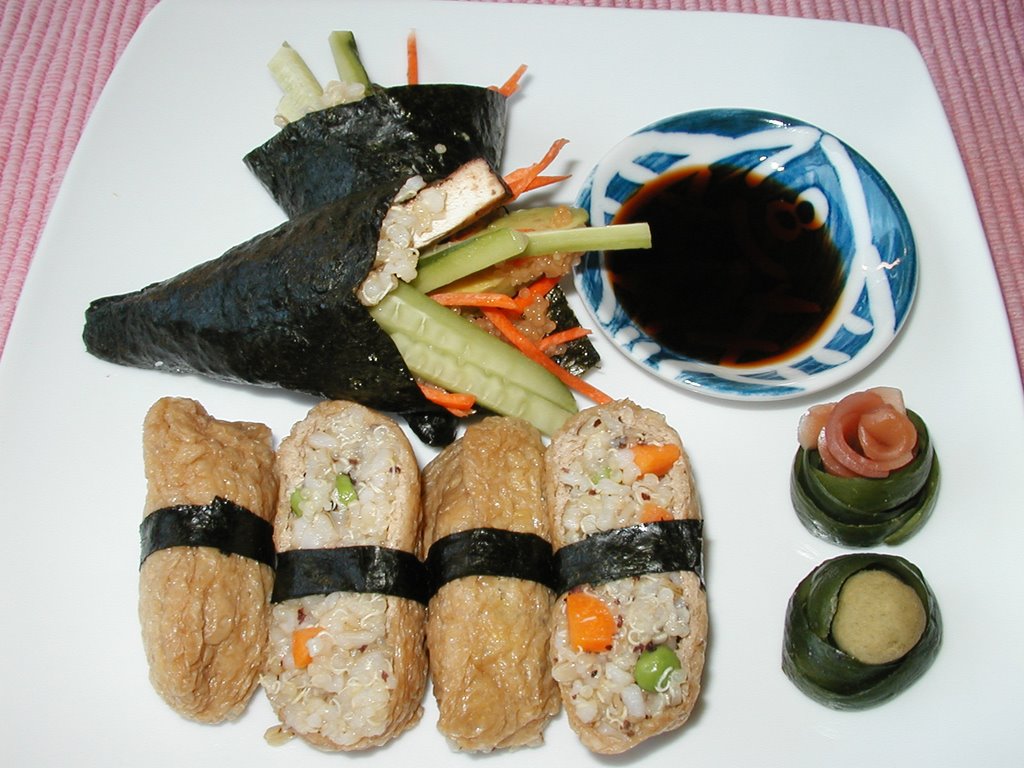
More sushi? That's right, I am sushi crazy at this moment. This time I made 2 different ones: Inari and Temaki sushi. Inari sushi is made of seasoned aburage or tofu pouches (the brown pockets) filled with sushi rice. The Temaki Sushi (the cone shape one) is a hand-rolled sushi which is great for a sushi party. I'll tell you why later! Both kinds were filled with brown rice and quinoa mixture from my previous post: Vegan Quinoa and Brown Rice Sushi and Cavi-Art.

It is easy to order Inari sushi in any Japanese sushi bar or restaurant. Most of the time, the chef can prepare you some. It is considered vegetarian by them but I know that usually fish broth is used to cook and season the tofu pouches. It is only a miniscule amount but it is not pure vegetarian. You have to ask! The Japanese market also sells the seasoned tofu pouches (ready made for Inari). But again, guess what is used to season them? Yes, bonito flakes or broth! So, please read the ingredients if you are concerned of buying a pure vegetarian product. I seasoned my own aburage (recipe below). Un-seasoned aburage or tofu pouches can be bought in any Japanese or Asian market. It turns out that I need to buy frozen ones since the refrigerated ones may have been on the shelves too long. They can become moldy as I found out. Yuck! The Korean market near me sells it in frozen section.


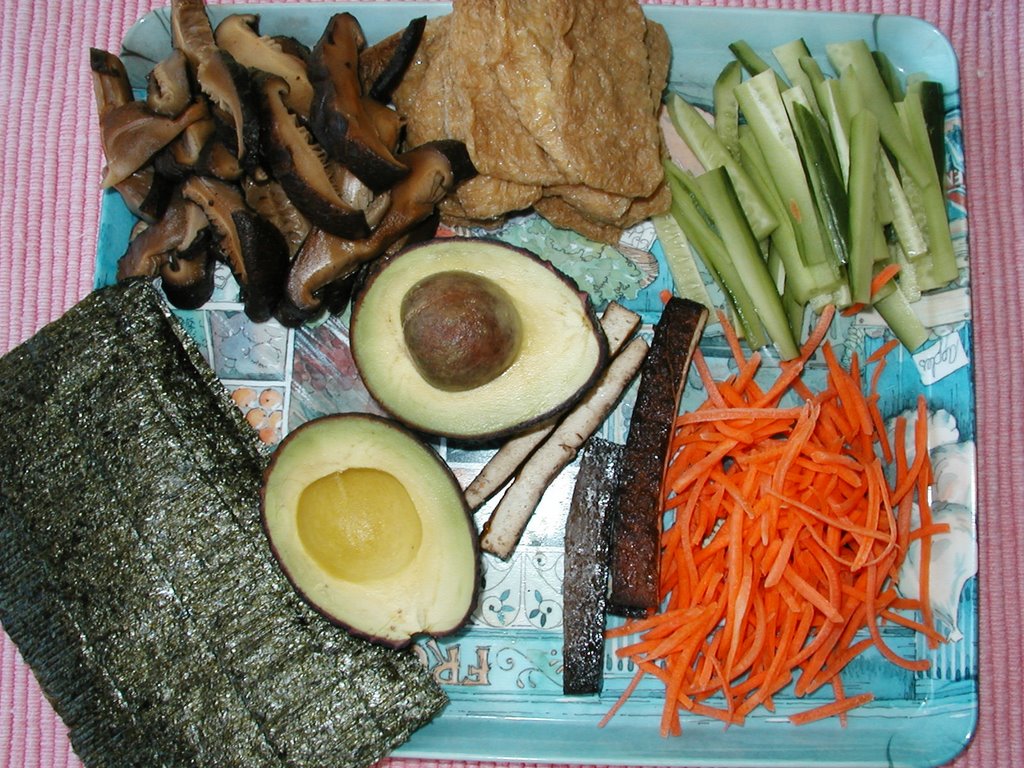
The Temaki sushi or hand-rolled sushi is great for a sushi party. This kind of sushi is only good to eat when it is freshly made (unlike the ones rolled in a bamboo mat). If Temaki sits for a while, the nori becomes tough and chewey. Therefore, instead of rolling them ahead for your guests, put your guests to work! The ones who don't want to do it can enjoy your pre-made Inari and bamboo rolled sushi pieces you prepare ahead. But most of the time, everyone wants to participate. You can pile all the fillings on a tray (as pictured below), prepare a bowl of sushi rice, and put them in the middle of the table. Each guest should be supplied with a damp hand towel to wipe their sticky hands from rolling and a small bowl of water to glue the nori together. Then, the host or hostess (ME!) can demonstrate how it is rolled and how to make the cone shape with the sushi rice and the filling in the middle.

Anyone can be taught to roll a Temaki; after all, I was able to teach DH (dearest husband) who doesn't cook but likes to eat. He did pretty well, too! It is fun if you are with good company who likes sushi and enjoys something different. It should be a fun thing to do for a small group gathering where you want to have some conversation to catch up with old or new friends.

The Temaki filling from the top left, clockwise, are: seasoned shiitake mushrooms (recipe below), seasoned aburage (recipe below), sliced Japanese cucumbers, shredded carrots, seasoned and smoked baked tofu (recipe below), organic avocado, and nori sheets (cut in half).

Below are small recipes to prepare for Temaki and Inari sushi:

Printable Recipe

Seasoned Shiitake Mushrooms
6 dried or fresh shiitake mushrooms
1/2 cup mushroom soaking water or vegetarian broth or kombu dashi
1 tablespoon organic sugar
1 1/2 tablespoon soy sauce or tamari
2 tablespoon aji-mirin

If using dried mushrooms, cover mushrooms in warm water until softened for 20-30 minutes. Discard stems from mushrooms and sliced them thin (1/4 inch thick). Place the rest of ingredients in a sauce pan, bring it to a boil, then, simmer mushrooms in this mixture for 10 minutes. Remove and let cool.

Seasoned Aburage (tofu pouches)
8 pieces thin deep-fried tofu pouches/aburage (store bought! don't try making it yourself)
1 cup mushroom soaking water or vegetarian broth or kombu dashi
2 tablespoons organic sugar
2 teaspoons mirin
2 tablespoons soy sauce or tamari

Boil about 3 or 4 cups of water. Remove from heat after boiling. Put thin tofu pouches in hot boiling water to remove the excess oil. Soak and dip for 2 minutes. Drain the pouches in a colander. Squeeze the water out after they are cool a bit.
In a saucepan, combine the rest of the ingredients and let it boil, stir to dissolve the sugar. Reduce the heat and simmer the tofu pouches in this mixture for about 10 minutes. Turn off heat and let it cool. Let the pouches soak in this mixture until ready to use. Squeeze the broth mixture out and cut each pouch lengthwise to make two open pockets. Seasoned aburage is ready to be used in Inari sushi.

Inari Sushi
1/2 recipe of brown rice and quinoa sushi filling (recipe in previous post)
1/4 cup chopped carrots
1/4 cup frozen green peas
16 pieces of seasoned aburage pockets (from above)
1 teaspoon dulse flakes, optional

Blanch carrots and green peas in boiling water for 2 minutes, drain, rinse with cold water to retain the color, and let them cool. Mix carrots and green peas with the sushi filling. Add dulse flakes, if desired, and mix well. Fill the aburage pockets with 2 to 3 tablespoons of sushi rice.

Smoked Baked Tofu
1 to 1 1/2 lb. extra-firm tofu
3/4 to 1 cup water
1/4 cup dark Superior brand mushroom soy sauce
Note: regular soy sauce will do but this dark mushroom soy sauce is my preference. It makes the baked tofu dark chocolate brown but the inside is light cream color. Pretty and delicious!
2 tablespoon maple syrup or organic molasses
1 teaspoon hickory liquid smoke

Slice tofu about 1/3-inch thick lengthwise. Mix the rest of the ingredients in a plastic container with tight lid in which you can soak all of the tofu slices in this marinade sauce. Marinate the tofu slices for 24 hours in refrigerator. Bake drained marinated tofu slices on an oiled cookie sheets for 10- 12 minutes in 400 F oven. Flip and bake the other side about another 10-12 minutes. Let them cool before use.

As you can see, it is not that hard to prepare. Now, if you want to learn how to roll a Temaki sushi, please let me know and I'll invite you to our sushi party. We can have conversations while rolling so we'll know each other better and become lifelong friends!

Saturday, August 19, 2006

Native Foods' Vegan Jungle Boogie Bars - our favorite!

We have boogied down with these bars for so long now. I said WE because I started baking these bars from The Native Foods Restaurant cookbook and then DH ended up baking them more often later on. They are actually DH's favorite and this time he actually made the bars pictured above and I decided to finally blog them. It has becoming his job to bake them and he does it very well.

The first time we tried the boogie bars was actually at the Native Foods restaurant (we are lucky to live only 10 minutes from the restaurant). They so good that I bought the cookbook because the recipe is in the book. Since then we make them at home often. Although, time to time, when we dine at Native Foods, DH still buys one to take home. I can't believe how addicted to boogie bars he is!

The bars are loaded with maple syrup. I think Canadians would love them. They are not cheap to make since real maple syrup is not cheap. Plus, I have all organic ingredients in our pantry that usually are not cheap. Other than maple syrup flavor, the bars are moistened with banana, oil, silken tofu, and shortening. I know, it is not low fat at all (I haven't yet de-fatenized it). Other ingredients are vegan chocolate chips, shredded dry coconuts, sliced almonds, flour, and rolled oats (sliced almonds for on top too). They resemble blondies but not quite like them. You just have to buy the book, bake them, judge them yourself and boogie down. But don't blame us if you'll get hooked. They can be stored in the freezer too (wrap them individually) but the best time to eat them is when they are freshly baked.

DH is an expert to bake these. His tips are to bake them longer (the recipe says 35- 40 minutes, he bakes them for 50 minutes), don't over mix when combining the liquid and dry ingredients (just fold them gently with a spatula), use a metal baking pan, and reduce the maple syrup about 1/3 cup.

Friday, August 11, 2006

Millennium Chocolate-Almond Midnight - Vegan Chocolate Mousse Pie


Yum yum yum! That's all I can say about this chocolate mousse pie. A bite of this pie, your tongue will fly to cloud no. 9. The creamy chocolaty mousse on top of a cashew crust was served with raspberry sauce/couli and almond pralines. Since I bought the Millennium cookbook, I have had a strong desire to make this dessert but I didn't want to make it just for the 2 of us. DH invited few vegetarian ex-coworkers to our home for vegan Japanese cuisine (guess who did all the cooking). Finally, I took this opportunity to make this mousse pie. Our guest was so impressed and said, 'If you didn't tell me that this cake is made of tofu, I would not know it!'. Oh, I love to hear that! Tofu rocks!

Yes, this mousse pie is made of tofu, 2 boxes of Mori-Nu Lite Extra Firm silken tofu! 2 cups Tropical Source Vegan Chocolate Chips were added to it. The crust underneath it is made of cashew, flour, and a bit of sugar. The crust was baked blindly first. Then, the silken tofu, melted chocolate chips, vanilla extract, sugar, are blended in a processor and poured into the baked crust. Then, I baked it for about 35 minutes. It was that easy!

I made the almond pralines and raspberry sauce myself too. The recipes for the pralines and raspberry couli are in the cookbook too. The Millennium restaurant in San Francisco serves this dessert at their restaurant every night. It has become their customers' favorite. I have never visited the Millennium but I would love to, one day.

DH doesn't like the raspberry sauce served with it but I do. The combination of chocolate and raspberry is my favorite. Fortunately, we had leftover and happily finished the leftover. It is not heavy as mousse with real milk/cream and I am sure that the calorie is half of the real mousse. It is so decadent that I don't miss the real mousse. It is long gone now but we still dream about it!

Monday, August 07, 2006

Vegan Quinoa and Brown Rice Sushi and Cavi-Art


As you can tell, I am still in Japanese cuisine mood! I made vegan quinoa and brown rice sushi this time. I have been making sushi since the days before I became a vegetarian (10 years ago) . After becoming a vegetarian, veggie sushi was one of the first dish I tried to make. However, last week, it was the first time I used quinoa and brown rice mixture (following WW Core) in sushi. The result was amazing!

The idea came from a recipe of a Sushi Salad (Bara-Sushi) with Quinoa and Brown Rice from Bryanna's newsletter. I was thinking that I can roll this mixture and make rolled sushi. I added some vegan 'fish eggs' in the sushi. Yes, there is such a thing! I can't believe it myself when I first heard about it from a friend that I had to order some. They are basically fake caviar made of sea vegetables. Check this out: Cavi-Art . It was invented by a mistake according to the story. BTW, only the Black and Yellow lumpfish are vegan. I used the yellow lumpfish in the rolled sushi and the black ones on top. Professional chefs use this fake caviar in their dishes, vegetarian or not. Probably, it is due the high price of real caviar.

The pale green glob is wasabi. I used natural wasabi powder I bought from health food market. Most wasabi out there contains green food coloring. The natural wasabi is pale but there is no additives in it. The Japanese market sells wasabi in a paste form in a tube like toothpaste too but I prefer the powder form without food coloring.

The pinkish rose is Japanese pickled ginger that I bought from an Asian market. The idea of making a rose out of pickled ginger came from my favorite sushi cookbook: Vegetarian Sushi by Brigid Treloar. This cookbook contains artful designs of vegetarian sushi and garnishes with lots of picture. I just love it! The recipes are mostly vegan except some that use omelet. What helped me the most was the technique to make sushi rice (brown or white). The rice has to be hot while the seasonings (rice vinegar, sugar, mirin, and salt) are poured into it. Then, you have to fold the rice with over and under motions while your other hand (or your loved one's hand) is fanning the rice with a fan. I usually use my left hand to fan and my right hand to stir and fold. It is quite a challenging! Just like when you try to draw a cirlce with the right hand and a square with the left hand at the same time. After a while, the sushi rice becomes cool, shiny and sticky. The technique really works!

Vegan Quinoa and Brown Rice Sushi
Makes 32 sushi pieces
Printable Recipe

Sushi Rice:

2/3 cup short-grain brown rice cooked in 1 1/4 water
1/2 cup quinoa cooked in 1 cup water
3 - 4 Tbsp. Organic Seasoned Rice Vinegar
1 Tbsp. Aji-Mirin (or other kind of mirin)
3/4 Tbsp. vegan sugar
1/2 tsp salt

Filling:

Shredded carots from 1 carrot
Thinly sliced peeled and seeded cucumber from 1 cucumber
Sliced avocado from 1 avocado
Yellow lumpfish and
Black lumpfish Cavi-Art


4 Nori sheets
a small bowl of water to wet your finger
Natural Wasabi Powder
Soy sauce

Preparation:
  1. Mix natural wasabi powder ( 1:1 ratio) with water to create a thick paste. Let it sit for at least 10 minutes (if you use it right away after mixing, it could be bitter).
  2. Cook brown rice for 45 minutes. 30 minutes after the brown rice has been cooked, cook Quinoa in simmering water for 15 minutes, remove it from heat and then let it sit for 10 minutes. This way the brown rice and quinoa will be ready almost at the same time.
  3. Combine brown rice and quinoa in a shallow glass bowl. Add all the seasonings for sushi rice (rice vinegar, mirin, salt, and sugar) and fold the quinoa and brown rice with over and under motions with a rice paddle while fanning the rice at the same time to cool it off. After about 5 minutes, the mixture should be cooler, shiny, and sticky. Taste the rice. Add more rice vinegar or salt if necessary.
  4. Use a sushi bamboo mat layered with a piece of saran wrap on top it, place the nori sheet on top of it (shiny side down).
  5. Divide quinoa and brown rice mixture into 4 equal parts. Layer 1 part of rice on the lower half of the nori and pat it down with your hand (using saran wrap helps for the rice mixture not to stick onto your hand). Cover only about 1/2 of the nori (lower half) with rice mixture.
  6. Pile filling lengthwise on the middle of the rice mixture.
  7. Lift the bamboo mat and fold all together to form a log on the lower half where the rice mixture covered the nori. Squeeze tight the bamboo mat evenly. Wet your finger with water and dab about 1 inch of the edge of the nori on the upper half.
  8. Release the bamboo mat and plastic wrap from the sushi log. Roll the sushi log to the upper half of the nori. Use the bamboo mat if necessary to tighten the roll. The upper half of the nori should stick to the log.
  9. With a sharp knife, cut the log into half. Then cut each half equally into 4 pieces.
  10. Repeat for the previous step to make 3 more rolls.
  11. Serve with wasabi, soy sauce, and pickled ginger.
I even taught my co-worker to make this during lunch time at work. My co-worker bought frozen already cooked brown rice from Trader Joe's and I cooked the quinoa at home. Then, we reheated both grains in a microwave. By golly, it worked! I really like the shortcut to buy the frozen brown rice from Trader Joe's! She thought that the fanning of the rice mixture was so much fun. She also said that someone really needs to show her how to do the technique because she would not able to follow just from a recipe. That made me thinking that I can start a cooking class and quit my job (just kidding).

Wednesday, August 02, 2006

Vegan Teriyaki 'Steak', is it possible?


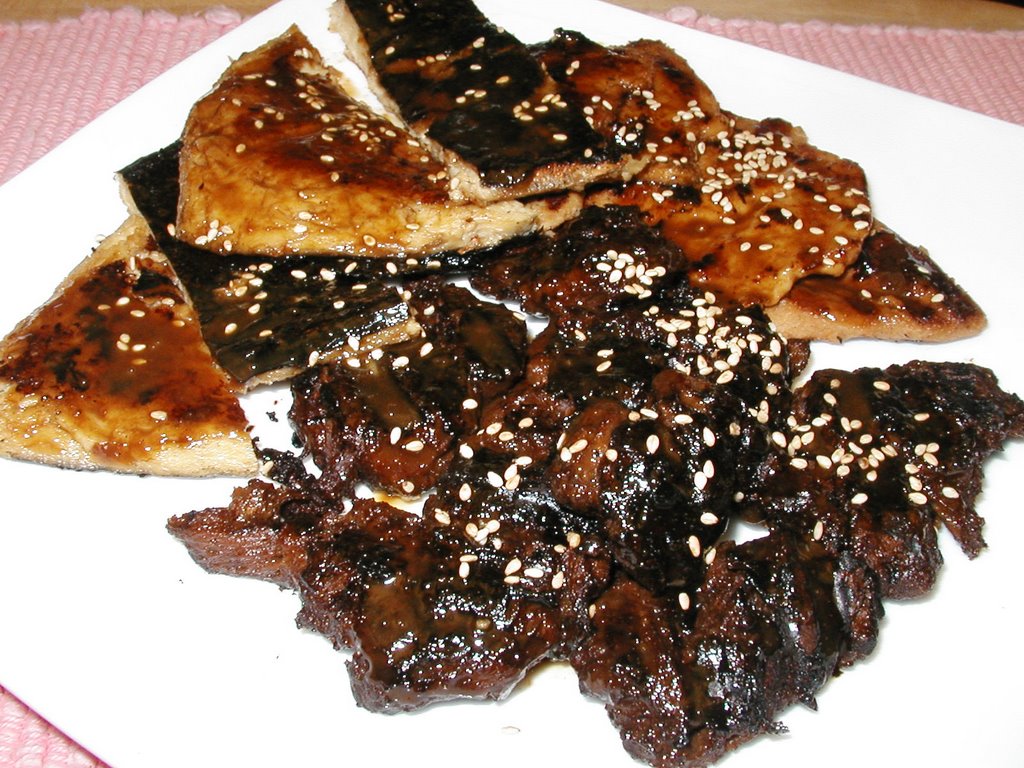
Yes, it is possible if you know Bryanna. I am her no.1 fan and a long time vegan feaster who follow her creations in her newsletters. Her recent newsletter features 'vegan steak'. So here it is, my use of her 'steak', and of course, I have to make it Asian style. Above in the picture are teriyaki 'steak' (DH called it Japanese Kobe Teriyaki Steak), teriyaki 'pork cutlet' (Bryanna's recipe too), and teriyaki 'eel' (using store bought vegan fish). These were marinated in my own wasabi teriyaki sauce and bbqued in my Cuisinart panini bbq grill/griddle. When I was eating meat, I love teriyaki anything and since I became a vegetarian I realized that I missed the flavor and texture of bbqed teriyaki instead of the meat and the blood in it. Bryanna's creation of faux steak has satisfied that cravings in me.

I know some vegetarians(non-vegetarians) are disgusted with faux meat or mock meat but I am with Bryanna in this. We are having fun creating faux meat or fish that it has becoming a culinary art. It adds more variety to the dishes that we create eventhough we already have a lot of ways we can do with vegetables, fruits, grains, and legumes. We play with wheat gluten flour, soy flour, tofu, and yuba to create mock meat and fish. Bryanna is definitely the 'Queen of Faux Meat'. She can create seitans that the results were almost too real. I learned so much from her (even flew hundreds miles to attend her cooking vacation in 2004) in making faux meat that I bought 25 lbs. vital wheat gluten flour and have been making so many different kind of seitan since.

I can't post the 'steak' recipe since it is reserved for vegan feasters only (who subscribes to the newsletter). I am posting my wasabi teriyaki sauce recipe which I created after I bought SoyVay Wasabiyaki sauce. Soy Vay has delicious sauces but this time I made my own to save money and honestly I can't stand the challenge of not recreating it at home. Here is the recipe:


Wasabi Teriyaki Marinade/sauce
Printable Recipe

2 cloves garlic, minced
1/2 cup chopped onions
1 tbsp toasted sesame oil
1/2 cup tamari or soy sauce
1/2 cup Aji-mirin or Japanese cooking wine
1 cup water mixed with 4 tsp cornstarch
1/2 cup organic apple juice
2 tbsp organic molasses or other sweetener
4-5 tsps wasabi powder
1 tbsp brown sugar

Heat 1 tbsp sesame oil on a skillet on a medium high heat. Add minced garlic and chopped onions. Saute for several minutes until onions are soft.
Add soy sauce, mirin, apple juice, molasses, and brown sugar. Let it come to a boil.
Add water and cornstarch mixture. Let it come to a boil again.
Add wasabi powder and turn off heat.
Transfer to a blender. With the top off or the middle part of the blender off (this is to prevent accident in blending hot mixture) and use a kitchen towel to cover the top and hold it with your hand, blend the teriyaki mixture for several minutes until smooth (carefully, start from the lowest setting of your blender and go the the puree setting).
Let the sauce cool before storing it in a bottle or jar. Keep in refridgerator for months.
Servings: 16
Yield: 3 cups

Nutrition FactsNutrition (per serving): 31.9 calories; 24% calories from fat; 0.9g total fat; 0.0mg cholesterol; 2.1mg sodium; 63.4mg potassium; 4.9g carbohydrates; 0.1g fiber; 3.3g sugar; 4.8g net carbs; 0.1g protein; 0.7 points.

We ate the teriyaki with pan fried cabbage, carrots, broccoli, and a bowl of steamed brown rice. I am going back to eating and cooking Japanese again. Japanese cuisine is the one cuisine I missed the most in terms of eating out (in my area, there is no Japanese vegetarian restaurant that I know of or any Japanese restaurant who serves vegetarian food).

Tuesday, July 04, 2006

Blueberry Raspberry Pine Nut Pie for 4th of July!

I haven't posted a blog for a long time. We have been on vacations to South Utah and Las Vegas for 1 trip and to Missouri to attend a family wedding for another trip. Then, I got a severe cold from a virus that I caught from the flight home from Missouri. Yaik!

Finally, here is the first bloggable item I made today. Berries are in season right now and I bought some to make a 4th of July pie. I was planning to take this pie to a 4th of July block party at our neighborhood tonight. Hence, it looked so good. DH and I were going to cut a piece and share it between us to try it out first before we served it to our neighbors because I have never made it before. Well, this plan didn't work well! We ate half of the pie in 1 sitting! After my 1st bite of the first piece, I kept getting another bite etc. etc. DH questioned "Where is my bite?" I gave him 1 bite and that was it, I finished the rest of the piece so he decided to cut his own piece. Then, I cut another piece after I ate my first piece. DH did the same, too. There you go, half a pie was gone in minutes. It is not that we are pigs but this pie is so goood! There is no way we will go to the party with half eaten pie so we decided to keep the rest for tomorrow(for us) and go empty handed to the party. Thankgoodness, bringing a dish was not required.


This recipe came from Love, Eric cookbook by Eric Lechasseur (see my previous post: Strawberry Mousse Cake). It is a 'wheat-free' recipe. I have never used spelt flour before and was surprised of the result of the pie crust. It was a great pie crust made of spelt flour, maple sugar, and safflower oil.

This pie is not low-fat because of the pine nuts which has 17 g of fat per 1/4 cup. It is deliciously rich but not too sweet. The blueberries compliment the rich filling. The original recipe use blueberries only but I added raspberries to make the pie red, white, and blue for the 4th (the pine nut filling is white).

I changed the recipe a little bit because I don't have grapeseed oil on hand. I replaced it with safflower oil. I also didn't use the glaze because I don't have kuzu and it still tastes yummy.

Here is the recipe:

Printable Recipe

Blueberry Pine Nut Pie (Makes 6 servings)
by Eric Lechausser (Love, Eric cookbook)


For the pine nut filling:1 1/2 cups pine nuts
2 oz. silken tofu (Mori-Nu brand)
4 tbsp. organic apple sauce
1 tsp aluminum-free baking powder
1/8 tsp sea salt
1/4 rice syrup
1 tsp vanilla extract
2 tbsp safflower oil

For the pie crust:1 3/4 cup spelt flour
1/4 tsp sea salt
1/3 cup maple sugar
1/3 cup safflower oil
1/4 cup water

For the blueberry topping:1 1/2 cups fresh organic blueberries
1 cup organic apple juice
1 tbsp kuzu or tapioca flour
1 tbsp agar flakes

To prepare the pine nuts:
  1. Preheat the oven to 200F
  2. Roast the pine nuts lightly on a baking sheet in the oven just until lightly golden color, approximately 4 to 5 minutes (or toast pine nuts on the stovetop in a skillet).
  3. Transfer roasted nuts to a food processor and grind into a fine powder.
To make the pie crust:
  1. Increase oven temperature to 350F.
  2. In a large bowl, combine the dry ingredients.
  3. In a small bowl, emulsify the wet ingredients then combine with the dry mixture.
  4. Knead quickly and allow dough to sit for 10 minutes.
  5. Roll out the dough to fit six 4-inch pie shells or one 8-inch pie shell. Bake pie crust for 10 minutes and set aside. ( I think he meant bake it blindly. I also use a fork to make tiny holes on the unbaked crust first before baking)
To make the pine nut filling and pie:
  1. Add the remaining ingredients to the pine nuts in a food processor and process until smooth.
  2. Pour mixture into the pie shell. Bake for 20 minutes. (I baked mine for about 30 minutes since I use a 9-inch tart pan).
To make the blueberry topping:
(I actually didn't make the glaze and just arrange blueberries and raspberries on top of the baked pie)

  1. In a saucepan, combine the apple juice with the agar over medium-high heat. Simmer until agar has dissolved, about 5 minutes.
  2. In a small bowl, dissolve the kuzu/tapioca with 1 tablespoon of water.
  3. Whisk the kuzu/tapioca mixture into the apple juice and continue cooking and whisking until mixture thickens.
  4. When it has fully thickened, turn off the heat.
  5. Add the fresh blueberries to the saucepan and stir the mixture with a spatula.
  6. Pour over the baked pie.
  7. Allow the pie to cool before serving.


Monday, June 05, 2006

Dessert: Strawberry Mousse Cake

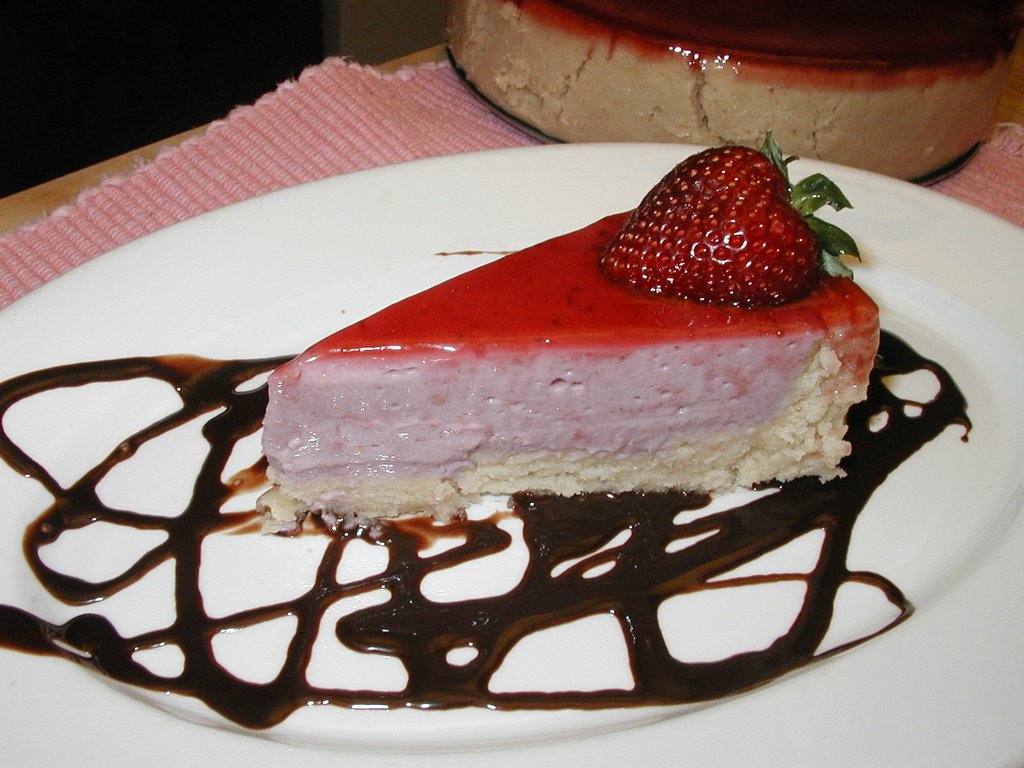
This dessert was not an impromptu one like the dinner entree and salad in my previous posts. It was planned as soon as I received Love, Eric cookbook by Eric Lechasseur sent by mail. This cookbook has beautiful pictures on almost every page. I highly recommend it to anyone who loves to make vegan desserts.

How I found the cookbook was another story. Julie, my friend in Oregon, recommended M Cafe De Chaya, a macrobiotic restaurant, in Los Angeles. We went there last month for a casual dinner to celebrate our anniversary. The dinner was great but I fell in love with their vegan macrobiotic desserts and pastries. A huge glass display case filled with European style desserts and pastries and they are all VEGAN. Oh my! My DH had to ask the guy behind the counter if it is true that there is no egg or dairy in ALL of them; although, there was a big sign hanging above 'NO DAIRY, NO EGGS, AND NO REFINED SUGAR'. It was confirmed that they are vegan. I pointed the sign to DH but he said, 'I have to ask and make sure because it is unbelievable!' True, it is unreal! We as vegans are so used to go to a bakery or patiserrie and just drool on what's on the display case and wish that they are vegan. But not here, at M Cafe, we can order whatever we want as long as our wallets can take it.

These are the kind of desserts I love, too. Growing up in Asia, I don't particularly appreciate American desserts since they are too sugary for me. Asian desserts are generally not very sweet. I thought it was just me for being 'not a dessert person' but actually it is just that I don't enjoy sugary desserts. Now I remember that I used to go to Little Tokyo in Los Angeles and visited their bakeries who serve French-Japanese cakes and pastries. I LOVE those! After being a vegan, I can't buy them anymore because they contain dairy, eggs, and gelatin. But now, I am not deprived anymore, M Cafe De Chaya has done it with their desserts! We bought many desserts and pastries to take home that day for breakfast and snacks the next day. They had to be eaten within 2 days, so we couldn't buy too many. We will come back to M Cafe for sure.

I was raving about the restaurant to Julie and thanked her so much for her recommendation. I talked about how the desserts were totally my style. She emailed me that their Chef wrote a cookbook about vegan macrobiotic desserts but she forgot the name of it, Eric something, she said. Cookbook? You know me, I determined to get it so I searched the Internet and Amazon. I finally found out the title. Julie also found the website for me: www.loveeric.net. Obviously, I had to buy the cookbook and bought it straight from the Chef. It didn't take me long to try one recipe.

The picture of my cake is not exactly the same as in the book since I am not a professional photographer. This picture I took is not as good as the cake. This cake is so elegant and delish! The strawberry mousse was lightly sweet, smooth, and creamy. The vanilla genoise cake has a soft and delicate taste. Overall, the cake is not very sweet. If you are used to sugary American desserts you may not appreciate this kind of cake which is more of a French style dessert.

There is no refined sugar in this cake. The ingredients used were maple syrup, brown rice syrup, organic apple juice, and organic strawberry jam (all fruit). The mousse is made of Mori-Nu tofu, fresh organic strawberries, tahini, organic apple juice, and agar flakes.

I already plan to make my next desserts from this cookbook which are going to be Blueberry Pine Nut Pie and Upside-down Berry Cake (I was thinking maybe for the 4th of July). I thank Eric for creating such a wonderful and beautiful vegan desserts to enjoy!

Sunday, June 04, 2006

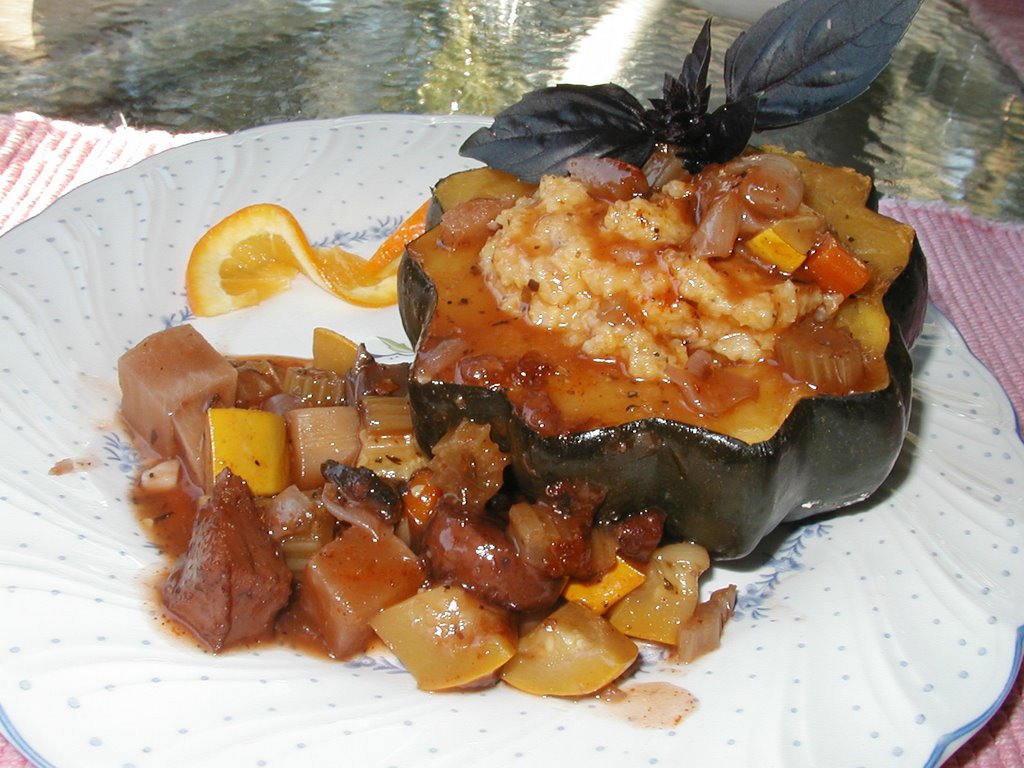
Dinner: Acorn Squash Stuffed with Sage Polenta and Seitan Bourguignon

What's on our dinner menu yesterday were the salad from my previous post (the Ruby Grapefruit one), Acorn Squash Stuffed with Sage Polenta and Seitan Bourguignon, and for dessert: Strawberry Mousse Cake (next post).

There was no special event or invited guests for this festive dinner. I just bought so many vegan cookbooks lately and wanted to try so many recipes.

The recipe of this dinner entree is from the Millennium cookbook's page 140 titled: Pumpkins Stuffed with Sage Polenta and Seitan Bourguignon. It is supposed to be a winter dish but it was an impromptu cooking, might I say. I brought the cookbook to Whole Foods with me while I was shopping thinking that I might get some ideas from it and from what's available at Whole Foods. If you ran out of ideas what to make, sometimes, this method will help. I opened the cookbook and sat it against my shopping cart. I was flipping the pages when my eyes caught on this recipe and at the same time I saw several acorn squashes were sitting on the shelf. I think these were the last batch in WF. Perusing the rest of the ingredients listed, I was sure that I can get them all at this market. I also found cipollini onions that I could add to this dish to replace the pearl onions in the recipe. These are unusual onions that the cashier was having trouble to find the code for it.

This dish turned out to be very elegant and perfect for a company dinner. It is so delicious and satisfying. The red wine sauce from the seitan bourguignon was really smooth on the creamy sage polenta and baked acorn squash. I didn't make my own seitan this time. Whole Foods sells White Wave prepared seitan that surprisingly was good in this dish.

Saturday, June 03, 2006

Salad: Ruby Grapefruit, Avocado, and Pickled Red Onions with Baby Spinach, Grapefruit Mojo Dressing and Chile-Lime Toasted Almonds


Ever since I opened The Millennium cookbook for the first time, I had been thinking of making this salad since the picture in this cookbook is so enticing. Today, I determined to do it cause it is such a perfect timing: summer has arrived in Southern California. It is hot and who wants to turn on the stove?

The title of this salad is a mouthful one but you can't really leave out any ingredient since each ingredient played an important role in the whole ensemble and deserved to be mentioned. Just like in the movies, all individuals contributed needs to be mentioned in the credits.

The Ruby Grapefruit and the Grapefruit Mojo Dressing played major roles and created refreshing flavors. The avocado added a buttery and creamy taste. The pickled red onions was a WOW! I fell in love with this pickled red onions that I may want to include it in my salads this summer, always. It is very easy to make: slice a red onion very thin, add minced grated lime zest from 1 lime, add fresh lime juice (about 1/4 cup), and sea salt to taste (about 1/2 tsp). Magic happens when you mix all these ingredients together and let it sit in the fridge for an hour or so. The onion releases sweet flavor and beautiful pinkish color. The strong oniony flavor was somewhat reduced. The lime zest, lime juice, and salt did all that for you.

The Chile-Lime Toasted Almonds is the best supporting star, I think. Without it, this salad is not complete. It is also so simple to make: mix a cupful slivered/sliced almonds with 1/4 fresh lime juice, 1 tsp. chili powder (I am thinking about chipotle powder next time), a dash of cayenne pepper and 1/4 tsp. sea salt. Mix them all together and bake in a preheated 350 F oven for 10-15 minutes until brown and toasty. Every 5 minutes, stir them all up so they are browned evenly. At first, I thought, hhmmm...toasting wet sliced almonds? But I went ahead and followed the recipe and they became crunchy and toasty at the end after they were cooled down. This toasted almond is so good I kept tasting them without the salad and had been thinking about making a big batch for snacks.

Baby spinach was what made it called salad. I supposed anyone can replace it with green lettuce leaves but I think spinach is more suitable for this salad. I bought organic baby spinach that were in plastic bags already triple washed to cut down some steps.

I pretty much followed the grapefruit mojo dressing recipe on page 41 but replaced the honey with agave nectar. I also did the variation: oil-free version, suggested in the cookbook by eliminating all oils and replaced them with lite silken tofu. So, this salad is a FAT-FREE one (I didn't even tell DH and he still likes this salad very much). There are lots of fat-free recipes in this cookbook including several salad dressings. This cookbook will become one of my favorites.

Thursday, May 25, 2006

Asian Noodles with Ponzu Sauce, Millennium style


Before I post the Asian Noodles dish recipe, I want to share how I came about making this dish. Recently, I bought 2 new cookbooks: The Millennium Cookbook and Artful Vegan from the Millennium restaurant by Eric Tucker and colleagues. These 2 cookbooks are not for beginner vegan cooks. The recipes are quite extensive and the ingredients used are very extraordinary. The restaurant itself is extraordinary, I heard, although I have never been there myself (planning to be there someday). I thought I already cook gourmet meals but compared to the way I cook, this restaurant really prepares super gourmet meals. The chefs are professionals in the vegan culinary world which I entered only on the edge of it, I think. I can’t imagine what my mother-in-law who lives in the midwest would say if she reads these cookbooks. She said that she enjoys my blogs but doesn’t know half of the ingredients I mentioned in my blogs. These cookbooks use all the ingredients I use and much more. I think vegan culinary world stands on itself as a vast world with no limit. Really, there is no limit of what you can do with fruits, vegetables, grains, seeds, and nuts. A lot of people just don’t know what to do with them but these professionals do.

The ingredients they used that I have never heard of before are like honshimeji mushrooms, mizuna green, black quinoa, and rose geranium (hhmmm…where would I get this). I thought I know a lot about food and culinary world but actually I don’t compared to these professionals. They don’t just use carrots, potatoes, and cabbage like the day-to-day cook in an ordinary family kitchen. They also have an advantage to be at a great location, Northern California, and have a direct contact with local organic farmers who deliver variety of vegetables and fruits, fresh, all year long.

The way Millennium chefs combine fruits and vegetables in making a dish is also amazing. For example, like their salad called Ruby Grapefruit, Avocado and Pickled Red Onions with Baby Spinach and Grapefruit Mojo Dressing, wow, what a name and the picture looks very appealing in this book. Many cookbooks have appealing pictures but the recipes are terrible. However, reading the recipes, I think, I can count on them. The key is to use good quality organic fruits and vegetables to make the recipe right and to adjust the 4 or 5 basic flavors (saltiness, sweet, sour, spicyness, and maybe the 5th flavor: umami or savory) in the recipe to your liking. Everyone has a different degree of each flavor. Eric Tucker, the main Chef, invited his readers to make adjustments and I will do so.

I picked a pretty simple dish for the first time from these cookbooks. The other recipes are not this simple. I have to admit that I appreciate their creativity in combining the ingredients together. The restaurant has an evolving menu which means the dishes they serve are not always the same and they depend on seasonal produce delivered by local farmers (maybe few items in the menu are rotated). According to Eric, the chefs of Millennium conduct a ‘virtual cooking’ where they meet and discuss what they want to do with the vegetables and fruits they received. They have a riffing or jamming with the stuff they have in the kitchen to create the restaurant’s next day menu. It is sort of like musicians composing new songs together. How fun! As their cookbooks reader, I am enjoying reading their creations, singing a new song page after page (although I am not familiar with some of the notes). I didn’t see vegetarian shepherd pie or vegan sloppy joe or tofu pot pie in their cookbooks. I sang those songs before and it is time for me to sing new tunes.

Printable Recipe

Ponzu Sauce
(Adapted from The Millennium cookbook, my changes are in italics)

4 cloves garlic
2 tablespoons coarsely chopped fresh ginger
2 stalks fresh lemon grass, mostly white parts, chopped into ½-inch pieces
1 teaspoon Sriracha hot sauce
¼ cup dry sherry, dry white wine, or nonalcoholic wine
2 cups water
1/3 cup tamari soy sauce
½ cup brown rice syrup

In a medium saucepan, combine all the ingredients and bring to a boil. Reduce heat and simmer for 20 minutes. Remove from heat and strain through a fine-meshed sieve. Let cool and refrigerate in an airtight container.

Asian Noodles with Ponzu Sauce(Adapted from The Millennium cookbook, my changes are in italics)

¾ pound dried soba or udon noodles
2 teaspoons canola oil
2 cloves garlic, minced
6 oz. Fresh shiitake mushrooms or other mushrooms, sliced thin
1 head broccoli sliced into small flowerettes
1 red bell pepper, sliced in thin strips
7 oz. Baked teriyaki tofu (store bought)
Note: I use store bought baked tofu to be simple, the original recipe uses smoked tofu
enough ponzu sauce to cover the whole dish ( about 1 1 /2 to 2 cups)
drizzles of sesame oil (optional)
2 teaspoons toasted sesame seeds

Cook the soba or udon noodles in salted water for about 5 to 7 minutes. Drain and cool noodles.

In a large pan or wok, saute the garlic in oil for 30 seconds. Add the shiitakes, broccoli, bell pepper, and tofu. Saute an additional 2 to 3 minutes. Add the ponzu sauce and bring to a boil. Add the noodles and toss the noodles with ponzu sauce and vegetables. Drizzle some sesame oil and sesame seeds before serving.

Saturday, May 20, 2006

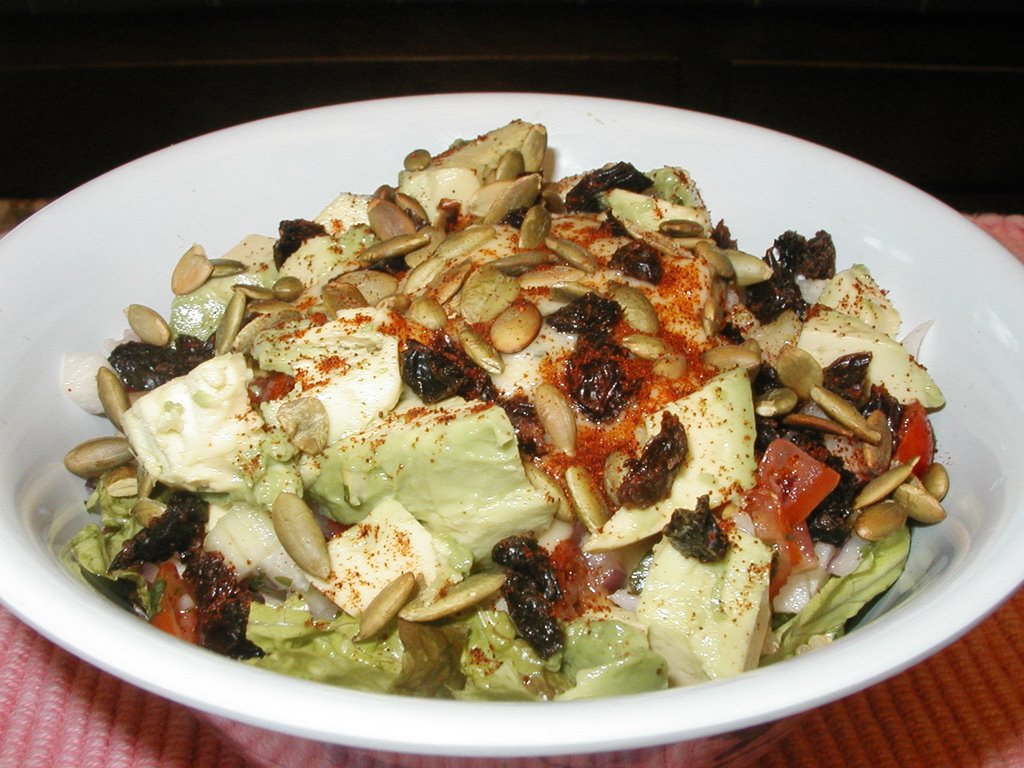
Quinoa salad with Mango-Lime dressing


This post is, similar to my previous post, a re-creation of Native Foods salad dish that I love . In Native Foods, it is called Ensalada Azteca which is a popular dish in this restaurant. I order this dish as the weather gets warmer in Southern California but I have to admit that I also eat it in winter time (if there is such a thing called winter in So Cal). I don't mean to take away Native Foods business but I thought, hey, not everyone can go to Native Foods so I hope they don't mind that I re-created their dish in the Internet. I changed the recipe so it is not exactly the same.

This salad is very refreshing due to the sweet pungent taste of Mango-Lime dressing. It is also very healthy because it has all the ingredients that are very nutritious for your body. The main ingredient is Quinoa (considered as one of the most perfect food). The other ingredients are chopped green lettuce, Jicama salsa, avocado, Mango-Lime dressing, roasted pepitas (pumpkin seeds), currants/raisins, and chipotle chili powder.

If you have a Native Foods cookbook, the salad recipe is called Mecca Azteca Salad on page 167. I followed this recipe but made changes to it. Here is what I did:

Cooking quinoa: Rinse 1 cup dry quinoa in cold water and let water run through it several times. Drain well. Toast dry the drained quinoa in a sauce pan for several minutes until they become dry and toasty. Add 2 cups water or vegetarian broth and 1/4 tsp. sea salt. Let it boil, then set the heat to low, cover, and simmer for 10-15 minutes until the water is absorbed. I kept the cooked quinoa in a tupperware in the fridge until serving time.


Making Jicama Salsa: Combine 1 1/2 cup chopped tomatoes, 1 1/2 cup peeled and chopped cucumber, 1 1/2 cup chopped jicama, 1 cup chopped red onion, 1/4 cup chopped cilantro (optional), 4 Tbs. lemon juice and 1/2 to 3/4 tsp. sea salt. I kept this salsa in the fridge until I am ready to assemble everything together. I actually kept it in the fridge for the whole week last week and enjoyed the salad all week long.

Making Mango-Lime salad dressing: I changed the recipe of Native Foods Mango Lime Vinaigrette to a lower fat version and add more ginger to it. Put 1 cup chopped fresh or frozen mango, 1/4 cup canola oil, 1/4 cup maple syrup, 1/4 cup fresh lime juice, a pinch of xathan gum (optional), 1 Tbsp. rice vinegar, 1 1/2 tsp sea salt, and 3 tsp. grated fresh ginger in a blender. Then, run the blender and puree until smooth and runny like a salad dressing, adjust by adding water as necessary. This dressing is so delicious and tastes like honey mustard dressing, sort of. I kept this dressing all week long in a glass jar.

What's left to do is roasting pumpkin seeds which is very simple. I buy raw pumpkin seeds from the bulk bin and then roast them dry on a non-stick frying pan until they are a little bit browned and crackling. I usually keep roasted pumpkin seeds in a jar to be sprinkled on salads.


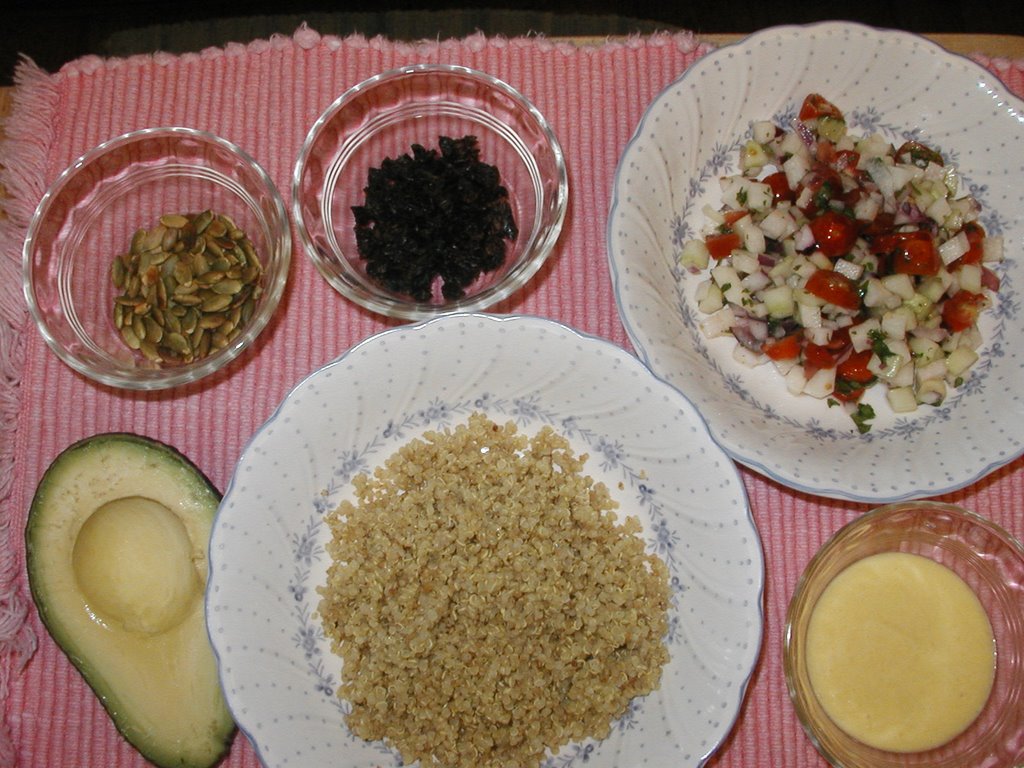
Here is the picture of the ingredients of the salad (from top left, clockwise): roasted pumpkin seeds, currants/raisin (I supposed dried cranberries will be good too), jicama salsa, fresh organic avocado, cooked quinoa, and mango-lime dressing.

I chopped 1/4 avocado and mixed it with 1 cup of jicama salsa for 1 serving (just before assembling). To assemble the salad, all week long what I did was bam...bam..bam.. and VOILA, I can eat after only a 5-minutes preparation: start with chopped green lettuce on the bottom the bowl, then add a layer of cooked quinoa, then add a layer of Jicama salsa with avocado in it, drizzled with Mango-Lime dressing, and sprinkled with roasted pepitas (pumpkin seeds), currants/raisins, and chipotle chili powder. Dig in and yuuumm!

Sunday, May 14, 2006

Portabella "Sausage" Burger...and Vegan Shoes

Our favorite vegan restaurant is definitely Native Foods, Costa Mesa. We live only about 10 minutes (freeway drive) from it. We visit this restaurant so often about once or twice a week. Yes, we are Native Food addicts. There are 4 Native Foods restaurants in Southern California and they are planning to open more. In this blog I will share how I reproduced their dish, Portabella "Sausage" Burger, at home

Before I start talking about this dish, I want to take this opportunity to share about the new vegan store called Humanitaire that was just opened. About 20 feet away from Native Foods front doors, we can hop into a vegan store that sells vegan shoes, handbags, belts, make up, T-shirts, jewelry, etc. etc. All items they sell are sweatshop-free stuff. How cool is that? It is hard to get vegan shoes on-line because I can't try it on. Vegan shopping was really not my priority but now it is getting up there because of this store. I bought 2 pair of shoes in 1 visit. Ouch! If you live in Southern California, please drop by.

One of my favorite dishes in Native Foods is the Portabella "Sausage" Burger. It is a grilled "sausage" seitan topped with balsamic glazed portabella mushrooms, Italian salsa, pesto, caramelized onions, roasted garlic, and green lettuce. The flavors of the items in this sandwich just burst into your mouth and the combination of the flavors is a match made in heaven.


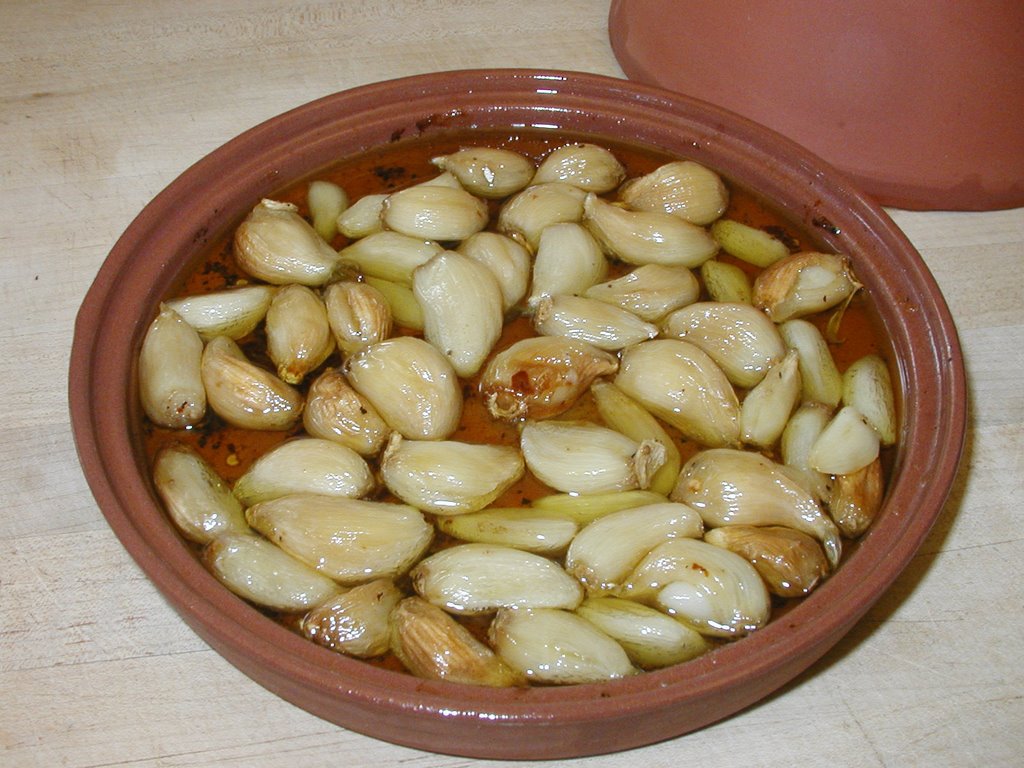
Many times I thought about recreating this dish at home. I finally did it. I started by roasting garlic in my onion/garlic baker(pictured). If you don't have one, I recommend it. If you don't want to buy one, you can roast them in a roasting pan, covered with foil. You can roast whole garlics or individually peeled. I live so close to a Korean market who sells peeled garlic by pounds so it is so convenient to buy peeled garlic and roast them at home. I put 1 cup of peeled garlic, 1/3 cup of olive oil, 1/4 tsp. sea salt, and 1/4 tsp. dry red chili pepper, mixed them all together, then baked in a 400 degree oven for 30 minutes. I put a lot of oil on purpose (sometimes I use 1/2 cup of olive oil). The purpose is to save the oil after I drained the roasted garlic. I called it garlic oil and used it for cooking other stuff. Garlic olive oil is ultimately delicious.

Here is the picture of the ingredients I put in this sandwich. They are (from top left clockwise) balsamic vinegar glazed sliced portabella mushrooms, Italian salsa, caramelized onion, and basil and walnut pesto. It took time to make these although each one was easy. It was well worth it though.

I also make my own seitan sausage, adapting Bryanna's Soy and Seitan 'Pork' Tenderloin with my own sausage spices. The recipe will probably be in the next Vegan Feast since Bryanna has asked me to submit it as a Reader's Recipe. Making the balsamic vinegar glazed portabella mushrooms was easy. I sliced portabella mushroom and sauteed them with garlic oil (from roasting the garlic) until the mushrooms were darkened and all the juices were almost gone. Then, I added 1 tablespoon balsamic vinegar and 1 tablespoon soy sauce to the pan. The juices evaporated right away and the mushrooms were glazed.
Making the caramelized onions was easy too. Again, start with the garlic oil, I sauteed sliced onions in it and cooked them slowly until the onions were translucent and darkened. I also added a little bit of soy sauce (about 1 tsp) and 1 tsp. maple syrup. The Basil and Walnut Pesto was also easy to make. Put about 2-3 cups packed fresh basil in your food processor, add about 1/2 cup toasted walnuts (or pine nuts), add 1/3 to 1/2 cup olive oil, add some roasted garlic (about 6 to 8), salt to taste, 2 teaspoons fresh lemon juice, and 1 tablespoon light miso, then, run the processor or pulse it until a pesto paste is form. For the Italian salsa, I combined chopped tomatoes, chopped kalamata olives, chopped roasted garlic, chopped parsley/fresh basil, and seasoned with salt and pepper.

Pictured above is how the sandwich was assembled. On the bottom half of the bun , I put caramelized onions, then the grilled seitan "sausage", then topped with glazed portabella mushrooms, then piled with Italian salsa, then topped with basil and walnut pesto. On the top half of the bun was chopped green lettuce.


Combine, squeeze, and bite into it! Hhhmm hhmmm hhmmm hhmmm! In one bite, you said 4 hhmmms, it must be good, DH said. It was very very good. It is definitely cheaper to make it at home and is very satisfying to know that I can reproduce it.

Monday, May 01, 2006

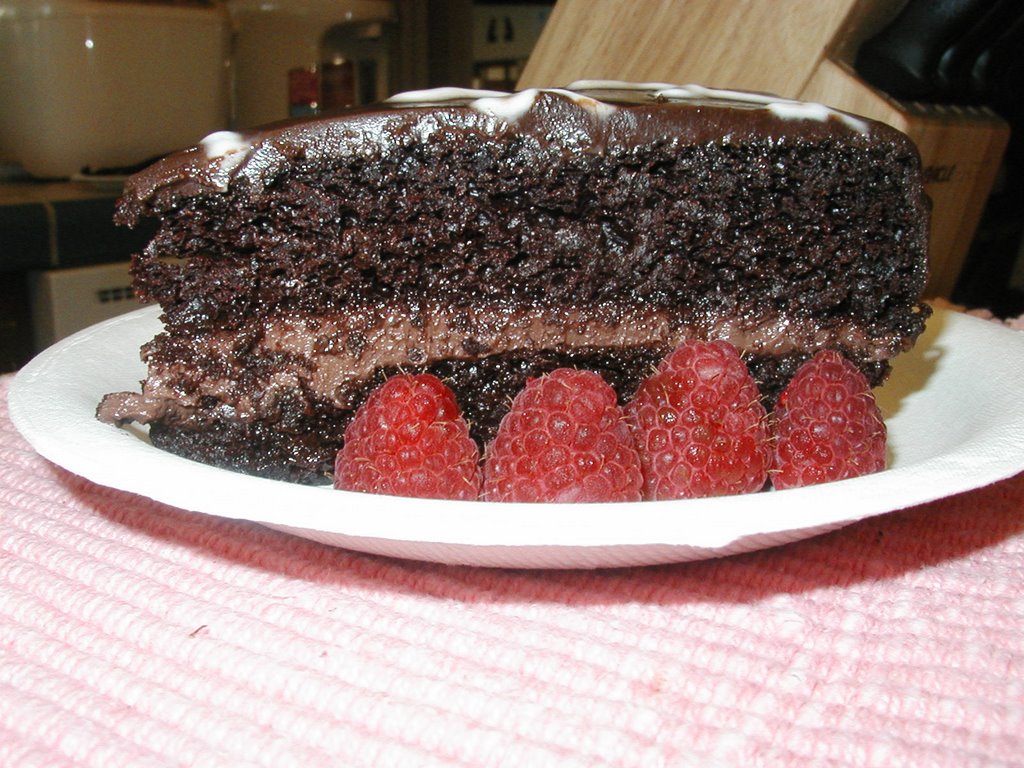
We live for this Vegan Chocolate Cake!


I made this cake for my husband’s birthday. It is a vegan chocolate cake with chocolate tofu cream filling and frosted with chocolate ganache. When it comes to eating cake, my dear husband (DH) demands CHOCOLATE, CHOCOLATE, and CHOCOLATE! None of those cakes with fruits or vegetables in it! We had a long discussion about his birthday cake. I don’t make much desserts at home to avoid gaining weight so every chance I have I want to try a new recipe from my cookbooks. I wanted to try a carrot cake recipe that my friends suggested from Vegan with a Vengeance (VwaV) cookbook but he said not for his birthday cake, he wants CHOCOLATE! So I thought about trying the Raspberry-Blackout Chocolate Cake with Ganache-y Frosting from VwaV. No, there are raspberries in it!, he said. Ok, I guess, he likes heavy-loaded pure chocolate and chocolate only, so CHOCOLATE it is! Although he let me put raspberries for decorations, there was no raspberry in the cake.

DH is a chocoholic and needs to go to a chocoholic anynomous meeting, I think, if there is such a meeting..and…I am a vegan cookbookoholic myself that I have tons of cookbooks; therefore, fortunately, I am able to find the ‘perfect’ chocolate cake I haven’t tried yet for his birthday cake. I bought Great Good Desserts Naturally! by Fran Costigan a while back and haven’t tried even one recipe from it. The cake recipe I tried was named ‘The Chocolate Cake to Live For’ and the filling is plainly ‘Chocolate Tofu Cream.’ This cake uses Dutch processed cocoa which is perfect because DH likes this kind of chocolate. We both don’t like the light color Hersey cocoa type but love semi-sweet dark chocolate of any kind.

This chocolate cake was soooo gooood! It melts in your mouth. It is the perfect title for it too since DH wants to live to 100 years if I make this cake for his birthday year after year. The chocolate tofu cream was so simple to make and so so delicious. The consistency was just perfect, too! All in all, it is the best vegan chocolate cake I have ever made. Really! When it comes to making a vegan chocolate ganache cake, I had a lot of practice because of DH. I recommend this cookbook to anyone and will buy her new cookbook: More Great Good Dairy-Free Desserts Naturally. I just can’t wait.

The frosting I used was the Ganache-y Frosting and the white squiggly on top was the Royal Icing, both from Vegan with a Vengeance. The only thing I did different than what the recipe suggested, I poured the hot chocolate ganache on top of the refrigerated filled cakes instead of waiting for the ganache frosting to become a spreadable consistency (refrigerated for 1 hour) to frost the cake. Then, I tilted the filled cakes to right and left to make the hot ganache flows down the sides of the cake. This makes a perfect smooth and glossy frosting after it is refridgerated for about 1 hour. This is my trick to make a beautiful cake without spending money at the cake decoration classes. I practiced doing the squiggly decoration on a wax paper and was doing ok enough to add the icing on the cake. After all, DH didn’t care much about the squiggly thingy.

BTW, I have been perusing Vegan with a Vengeance cookbook a lot lately and visited Isa Chandra’s website. Check out these cupcakes pictures: Fauxstess cupcake with squigglies on top and Isa Chandra's vegan cupcakes. Aren't they beautiful? This is where I got the idea for the squiggly decoration. I will definitely buy her new cupcakes cookbook and make the cupcakes with squigglies on top someday.

Before I end this long blog, I want to share a few tips of baking a cake. I learned these tips from others and from practicing making Chocolate Ganache cakes, you know for who! I think I am qualified to give a class of ‘How to make a perfect vegan Chocolate Ganache cake’ by now since this is the only vegan cake that I can make perfectly, thanks to DH.

First of all, I learned about baking911.com from Bryanna. It is not a vegan website but is loaded with information about baking. Preparing the baking pans is a crucial step in baking cakes. I use the Baker’s grease suggested by this site which you can buy at the cake supply store but it is easy to make at home: mix well an equal amount of vegan shortening (like Spectrum), canola oil, and unbleached flour. For baking cakes, I still use a parchment paper for the bottom of the pan and then use the baker’s grease on top of it. You don’t need to flour the baking pans with this grease. THIS is the benefit and it works like magic. I usually store my baker’s grease in the fridge and take it out to a room temperature before I prepare my baking pans. It actually works for baking just about anything and not just cake. I used it to grease my corn-shaped cast iron muffin pans and the corn-shaped muffins didn’t stick to the pan at all. I have had a great success using this baker’s grease and never gone back to oil and flour my pans anymore.


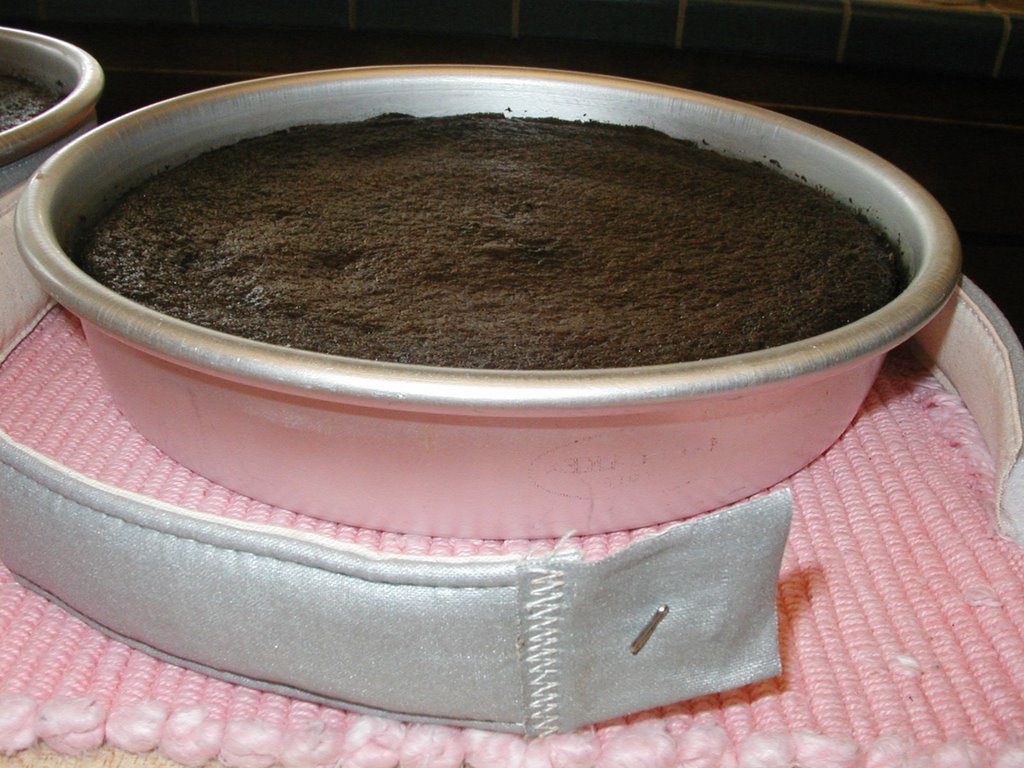
Second, buy the Cake Magic Baking Strips ! It is well worth it. Have you ever bake a cake and then the cakes have a hump in the middle and then you have to use a knife to level it out before you frost it? I really hate that! It takes a lot of work to prepare the cakes before frosting it and then I have cake crumbs all over. This magic strips really work well. I enjoy watching my cakes baking in the oven and rising evenly. I have even levels cakes coming out of my oven all the time now. You can make your own at home buy cutting old kitchen towels, wet them with water, and then wrap them around your cake pans with safety pins. I tried that too but didn’t like the frayed towels around the cake pans. I am afraid that the cotton strings will end up in my cake. So to avoid so much trouble I bought these magic strips for $6.95 in a kitchen store near me. It can be reused again and again.

Friday, April 28, 2006

International leftovers


I cook so many different cuisines from the world that sometimes they cross over and meet on the same plate (sort of like a meeting at the United Nations). The plate above consists of 3 different cuisines from 3 different countries. The rice was actually a leftover Mexican rice from last weekend and my previous post. The recipe yields so much rice that I still have some a week later. It seems that we would never see the bottom of my rice cooker bowl. The dish on the right, the yellowish one, is Malay-style Yuba(beancurd skin) and Daikon curry from Bryanna's April/May 2005 Vegan Feast newsletter. It is a delicious Malaysian curry spiced with galanga, lemon grass (from my own garden, of course, see my previous post), ginger, tamarind, garlic, onions, and a hint of coconut milk. The dish on top is Chana Masala, an Indian chickpea curry recipe that my friend Val sent me by email.

Amazingly, the 3 dishes from 3 different countries compliment each other. I used basmati rice in the Mexican rice so it worked well with the Indian Chana Masala and the Malay yuba curry. These dishes were all mildly spiced.


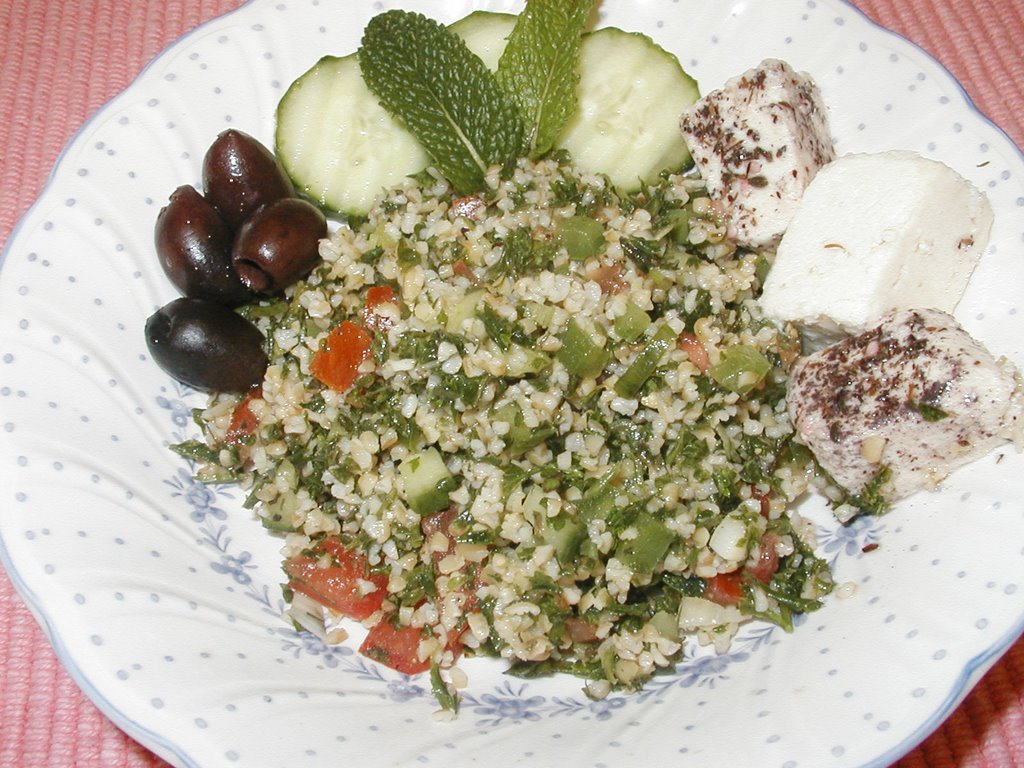
On top of those, for starters, we had a leftover Tabbouleh(Middle Eastern Bulgur and Parsley salad) , leftover Bryanna's Tofu "Feta" that DH loves so much, and Greek kalamata olives. DH exclaimed 'I am having Morrocan Mint Green Tea with this meal!'

For the dessert, we had a store bought American Vegan Oatmeal Chocolate Chip cookie. There you go, an international leftovers that are eaten in one meal. I wonder if people eat like this in the U.N. cafetaria. Today, dishes from different countries are having a peaceful time together in our tummies. Peace not war!

Will work for vegan food!


California has a good weather to grow lemon grass . I started my plant with one stalk that had a root on it and planted the whole thing in the ground. Then, I just wait for it to grow. I don't even water it by hand since we have an automated sprinkler system. It just keep growing and growing for all seasons, year after year.

The best use of it is for cooking Thai, Indonesian, or Vietnamese dishes. I usually just walk out to my backyard with a knife while putting on a plastic glove over one hand. I used my gloved hand to grab one or two stalks and use the other hand to cut the stalks near the root. It is that easy to get fresh lemon grass for my cooking.

Last weekend, I decided to trim down my lemon grass bush since it is overgrown. I dreaded this job because it is not a simple task and takes a long time. It is different than just cutting a stalk or two for cooking use. I needed to pull some of the plants from the root until the bush is thin enough to propagate again. Unlike, harvesting tomatoes, zuchinni, asparagus, or other vegetables, this one needs digging, pulling, cleaning, and cutting the top leaves off. Fortunately, we had a heavy rain the night before. So the digging and pulling was easy since the soil was wet and soft. The hard part was separating the stalks, cutting the top leaves off, and cleaning them. The weather was nice last Sunday. It was not too hot and not too cold.

It took me about 3 hours to do this work. The result was great. I had about 66-70 lemon grass stalks. So now, what do you do with so many lemon grass stalks? In the past, I gave some to friends and vegetarian Vietnamese restaurants. The Vietnamese restaurant really uses a lot of lemon grass. For the restaurant, in return, we received a free dinner for two. We decided to give them all to the vegetarian Vietnamese restaurant this time as we did in the past in exchange for dinner that night. I felt great that I was able to work for food....so I thought.

Unfortunately, the vegetarian Vietnamese restaurant was not cooperating this time, not like they were used to. They didn't want to give us free dinner for two in exchange. They wanted to exchange it with a bowl of Vietnamese noodle soup that costs only $5.50. I was appalled and thought that it was not a fair exchange. The amount of lemon grass stalks I brought filled up the whole brown supermarket bag. For about 70 stalks of fresh lemon grass, I don't think you can buy it for $5.50. The lady in the restaurant said that she buys them wholesale so she can get them very cheap. After bargaining with her, she agreed to give us 50% off of our dinner bill. My husband and I usually spend US$20-$28 when we eat there. That night our bill was US$26 so we only paid $13 for our dinner. DH said that next time we just give the lemon grass to friends and pay for the dinner or the bowl of noodle soup. It wasn't worth the effort!

Monday, April 24, 2006

Vegan Drunken Beans


When Bryanna released her April-May-June 2006 newsletter, I was intriqued by one entrée she presented: Drunken Beans. I pictured drunk little pinto beans are rolling over and swaying right to left. I was chuckling by myself reading the recipe which, indeed, contains beer, and therefore; it is called drunken beans. I might have a strange imagination but the vision of drunken beans reminds me of Mexican Jumping Beans. In fact, I googled them and ended up reading the article in the Internet about these jumping beans. It is so interesting that the jumping beans are not really beans and they really don’t jump but just roll around. What really makes them roll? It is not beer, for sure, but a larva of a small grey moth that has a peculiar habit to throw itself from one wall to the other. If you want to get acquainted with this peculiar moth, you can read the article and amuse yourself.

How easy it is to get off the subject of cooking beans to a larva of a moth in a seed capsule! Going back on track, this drunken bean dish is really really delicious! I think it is the best Mexican bean dish I ever made. I served the yummy beans with molé ‘chicken’ and Mexican rice. Both recipes can be found in Bryanna’s new newsletter, too. I added a garnish of grilled flour tortilla and avocado slices.

I changed the drunken beans recipe slightly by adding epazoté as suggested by Dori from the Bakehouse. Epazoté is a Mexican herb known to ward off the side effect of eating beans. For those who eat beans, you know what I am talking about! I really know what this gourmetsleuth.com article is talking about. DH and I are blaming each other all the time and we used to blame our dog (that poor creature that it is now in a doggy heaven). I didn’t notice the pungent and ‘gasoline/kerosene’ smell like this article mentioned about epazoté. This article says that it is referred to as an ‘acquired taste’ like cilantro. But we both like cilantro and we are used to authentic Mexican dishes living in California for years. In fact, I thought this bean dish tastes so authentic like the beans in Mexican restaurants. I will definitely be making this dish again and again.

Bryanna’s method of cooking was slow cooking with a crock pot or slow cooker. I chose to use my pressure cooker for 16 minutes and finished it up by simmering the beans until it became a chili-like texture for less than an hour. It really doesn’t matter, I think. Just a matter of making the beans to drink the beer fast or slow, but beans are beans!

Thursday, April 20, 2006

Panini! Panini! Panini! Crazy for Panini!


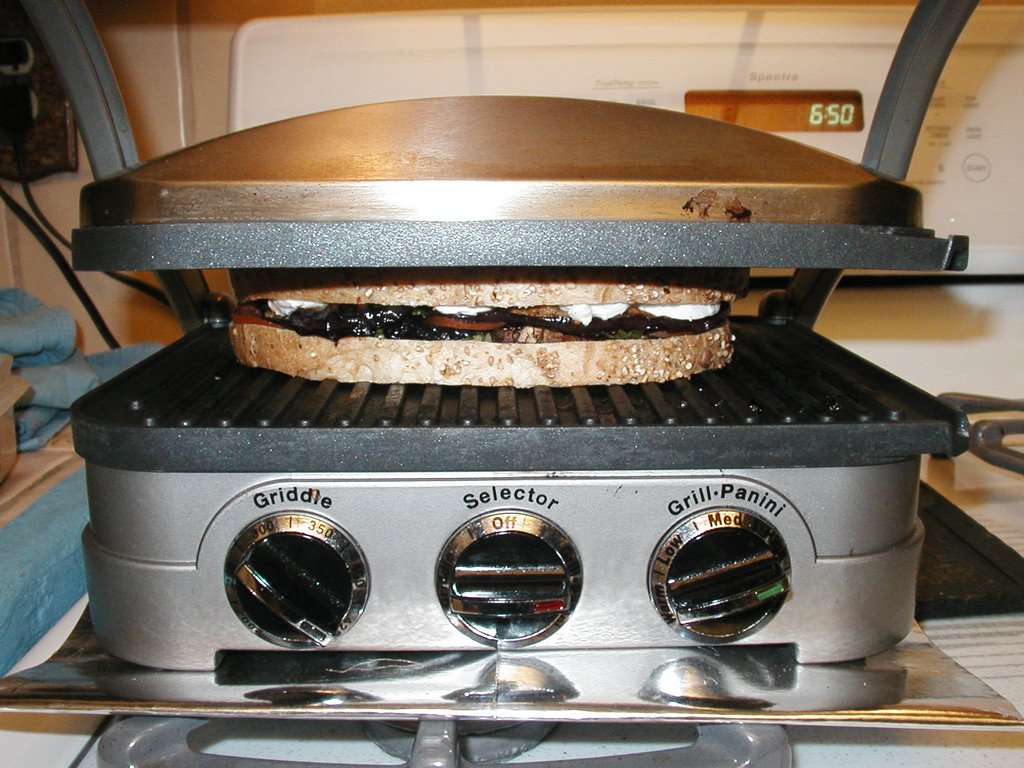
My dear husband(DH) buys kitchen appliances for me as xmas, anniversary, or birthday gifts. Don't laugh! That's what I ask for! YES, it is not romantic and YES, it is unusual, but so what, right? Gifts are supposed to make the ones who receive them happy and I am happy receiving this kind of gifts. My heart jumped with delight to see this Cuisinart panini grill came out of the box last Christmas. Pictures of grilled paninis, BBQed seitans, BBQed TVPs, satays, and grilled vegetables immediately filled my mind. As you can see, the kitchen appliances I asked for are not the CHEAP kinds but I usually did a thorough research in the Internet for months before hand: reading comments people made about it, asking for recommendations, and finding the style and model that is suitable to my need. It always pays off! I have been using this grill for almost everyday since I got it and DH is really eating well! It's a win-win situation.

The first thing I made on my new panini grill was a panini sandwich, of course, a Vegan Caprese Panini, with the help of Bryanna's best 'cheese' (pictured on the right) recipe from her newsletters. You can always buy Vegan Mozarella (Earth Kind is my favorite brand) from the market but it can be expensive. Vegan Caprese filling was a combination of 'cheese', fresh sliced tomatoes, fresh shredded basil leaves, balsamic vinegar, EVOO (Extra Virgin Olive Oil), salt, and pepper. I arranged those in the middle of 2 slices of crusty artisan bread or sourdough bread brushed with EVOO on the outside. Then, I 'sandwiched' them in the panini grill. VOILA! Seven minutes later, a hot grilled panini sandwich was born. The filling was HOT! The 'cheese' was melted and warm.

Do you know how much a panini sandwich cost in a cafe called The Corner Bakery (a food chain) in my area? It's about US$6.49 for the sandwich only! After a bag of chips and a drink, your bill can go up to US$9.00. After making 16-17 paninis at your home, you will get your money back buying this grill and still can make some more. At our home, we didn't have to wait long. I made 12 panini sandwiches for 12 ladies who came to my party in February and they were loving it.


More? Yes, I made more, another type of panini, the 'Chicken' Pesto Panini. I made my own soy and seitan 'chicken' cutlet. Again, I learned it from Bryanna, and again, from her newsletters. I also made my own vegan pesto, Pesto Genovese, a recipe from Nonna's Italian Kitchen. A combination of 'chicken' cutlet, pesto, 'cheese', and sliced tomatoes or other veggies was very very good. The only veggie that was not good to put in a panini is LETTUCE. Don't ever put a lettuce in a panini sandwich. Remember, anything you put in the panini sandwich will be hot. You know, hot lettuce really tastes terrible! LOL! I learned this mistake!

I continued experimenting with other fillings for panini sandwiches such as marinated artichoke hearts, roasted bell pepper from jars, ajvar, raw baby spinach, grilled vegetables like eggplants, zucchini, carrots, mushrooms, and onions. Other than spinach, vegetables need to be grilled separately before they are assembled in the sandwich.

My wildest panini experiment was Vietnamese Style Banh Mi Panini! Is this a FUSION sandwich or what? I hope the Vietnamese and the Italians will not be angry with me for ruining their cuisine. :-) Banh Mi is a Vietnamese sandwich that is prepared in crusty French baquettes filled with meat slices, tangy marinated shredded carrots or daikon radish, cucumbers, cilantro, sliced jalapenos, moistened with mayonnaise and sprinkled with soy sauce or fish sauce. I often made the vegan versions and brought them with us when we travel. Once, someone saw us eating our vegan Banh Mi sandwiches at an airport in Jamaica. It probably looked so good that she asked me if she could find and buy the sandwiches we were eating in that airport.

The filling of this sandwich was the leftover BBQ TVP slices from Vietnamese BBQ Noodle salad from my previous post. The idea came when I ran out of noodles but had artisan bread at home. I added the tangy carrots, cucumbers, cilantro, and sliced jalapenos too. I didn't use vegan mayonnaise since DH doesn't like mayonnaise. Instead of EVOO, I used Earth Balance brushed on the outside to add the 'buttery' flavor to the bread. It was delicious and unique!

It is so cheap to make panini at home. Each sandwich probably costs me only US$2.00. That is if you make your own 'cheese', Pesto, 'chicken', and BBQ TVP slices. It will be less if you make your own bread (Bryanna's sourdough bread) and grow your own basil or other veggies, too.

Monday, April 17, 2006

Vegan Easter Breakfast and Dinner


For Easter Breakfast, I made Tofu Frittata accompanied by Pumpkin Cinnamon Rolls with Pecans and Dried Cranberries. The Tofu Frittata recipe can be found in Nonna's Italian Kitchen by Bryanna Clark Grogan. I added 1 tablespoon Bill's Best Chicknish in the frittata and sprinkled the top with Smoked Spanish Paprika. In the frittata were slices of leftover steamed potatoes, broccoli flowerettes, chopped carrots, sliced onions, chopped Seitan 'Pork Tenderloin'(from Bryanna's Newsletter, Jan-Feb-Mar 2006), and chopped leeks. It was quite delicious. My husband gave me 2 thumbs up.

I really didn't make the cinnamon rolls that morning or the night before. They were actually frozen in my freezer for months. I made the rolls last Fall after Bryanna's Fall Newsletter(Oct-Nov-Dec 2005) was published. I wrapped the roll individually with Press N Seal and put them in a freezer ziplock bag. I love this cinnamon roll a lot because the filling is so delicious with mashed pumpkin, Earth Balance, brown sugar, chopped toasted pecans, and dried cranberries. I just took them out Easter Sunday morning and reheat them in a 400 F oven for 15 minutes. Surprisingly, the rolls were still delicious like it was freshly made. Whoever knew that I was going to enjoy this cinnamon roll on Easter when I baked them last Fall.

The bright orange sauce in the picture above is store-bought Ajvar or Bulgarian Sweet Pepper Relish(Zergut brand). I am actually addicted to this condiment. It is good with scrambled tofu, tofu omelet, sandwiches, or tofu frittata. I suppose I can try to make it at home but I can buy it easily in the market near me so why bother. The price is not bad either and the time consumed to make it will not be worth it for me.

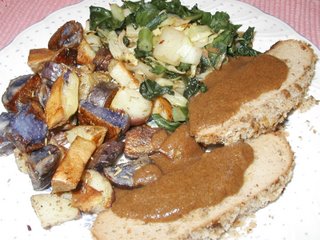
For Easter dinner, I served Soy and Seitan 'Pork Tenderloin' with Garlic and Herb Crust from Bryanna's Jan-Feb-March 2006 newsletter accompanied by roasted red, white, and purple potatoes, sauteed kale and chards, and low-fat vegan rich brown gravy. The Soy and Seitan 'Pork Tenderloin' was coated with brown dijon mustard first and then it was covered with a combination of minced garlic, thyme, marjoram, and fresh bread crumbs. Then, it was baked in the oven to perfection. My husband really likes this seitan and he likes it better than veggie 'ham' for Easter.

Wednesday, April 12, 2006

Vietnamese Salads: Vegan BBQ Noodle Salad and Young Jackfruit Salad


Vietnamese BBQ Noodle Salad
 These Vietnamese salads are excellent for hot weather meals. No, summer is not here yet, we have a bright and sunny spring weather for a change, but I wanted to make them since they are low in fat but delicious. To help me loosing weight, I eat Vietnamese vegan dishes such as Vietnamese Salad Rolls (spring rolls), Vietnamese Pho, and these salads: Vietnamese BBQ Noodle Salad and Young Jackfruit salad(the 2nd picture below). They are yummy and refreshing!

To enhance the BBQ noodle salad to be more nutritious, I use Japanese Zaru Soba which I found in the Korean market near our house to replace the white rice noodle. The Zaru Soba is thin like vermicelli but it is made of wheat flour, buckwheat flour, yam, salt, and water. In fact, I thought it will be good for Pho or any pasta dish that uses white pasta. Zaru means a draining basket made of bamboo which can be used as cooking and presentation according to wikipedia.org (click here for more information).
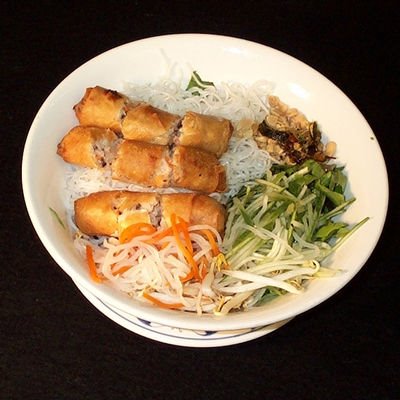
For the Vietnamese BBQ noodle salad, I served the cooked and well drained soba in a bowl topped with fresh vegetables such as thin strips of carrots, thin strips of cucumber, fresh bean sprouts, and fresh mint leaves from our garden. Then, I topped it with grilled marinated Vietnamese BBQ slices made from ‘beefy’ TVP which were grilled on our Cuisinart indoor grill. At the end of the BBQing process, I sprinkled the BBQ slices with roasted rice powder which makes them so tasty.
Roasted rice powder is commonly used in Vietnamese dishes and very easy to make. I pan fried dry (without oi) uncooked rice on a frying pan until they are golden brown. Let it cool and then grind into a powder in a mini blender. This dish is served with sweet and sour dressing on the side. The last topping is chopped roasted peanuts. Pour the salad dressing over the noodle dish just before eating, mix them all up, and enjoy. It is usually served at room temperature which is perfect as a picnic or lunch in the office or travelling dish.
Vietnamese noodle salad is usually served with deep fried Vietnamese eggrolls. It is very yummy but also has more oil and fat content so, at home, I opt to serve without them. In vegetarian Vietnamese restaurants, you can order a combination of eggrolls and BBQ TVP slices on top, a common way to serve it. The salad dressing in restaurants is generally too sweet for my husband’s taste so he usually don’t use much of the dressing. My recipe uses less sugar (I actually use Agave Nectar). It is a matter of taste, you can add more sugar if you want.
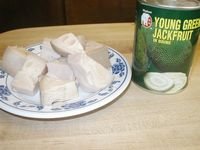
Young Jackfruit salad is unusual for us here in the US. I actually didn’t know about this salad until I became a vegan and explored the vegetarian restaurants near us. Of course, I cannot get fresh young jackfruit here since it is a Southeast Asian fruit but I can buy them in cans soaked in brine at the Asian market. It is the YOUNG jackfruit that I used here and not the RIPE yellow jackfruit which is totally different in smell and taste.
This salad is served room temperature and is sour and refreshing, similar to Thai Som Tum (young papaya salad). It is topped with roasted chopped peanuts, chopped cilantro, and drizzle of fresh squeezed lime juice and Sriracha hot sauce. It is served with Vietnamese sesame rice crackers on the side which are used to scoop the salad with (sort of like eating Mexican Nachos).

The Vietnamese Sesame Rice Crackers or Chips are also unique and available only in Vietnamese markets. It is called Banh Da and is made of tapioca flour, rice flour, salt, and sprinkled with black sesame seeds. It is toasted or roasted which causes it to puff up and become crispy like chips. This time I bought them ready made from the market.

Other times I buy the raw ones in a plastic container which looks like rice papers used for Vietnamese spring rolls. I usually roast these on an open fire or a hot grill. Although this cracker does not look that appetizing on the picture, it is yummy with the salad. If Banh Da is not available, you can substitute it with Indian papadum, Mexican tortilla chips, or Japanese rice crackers.


Vegan Vietnamese BBQ Noodle Salad
I often order this dish in a vegetarian Vietnamese restaurant near my house. The dish is low fat but full of flavor (from the lemon grass and five spice powder). I usually pour all the sweet and sour dressings over the noodles and mix them all together. This is a cold noodle dish and can be eaten at a room temperature which is perfect as a picnic or travelling dish. What makes the BBQ TVP slices taste savory is the dry roasted rice powder which is a common use in Vietnamese cuisine.
Servings: 6
Printable Recipe


Ingredients:
2 1/2 cups dry vegetarian protein meat slices (TVP) or Soy Curls
16 oz Rice noodles (same one use in Vietnamese Pho noodle) or zaru soba
2 carrots, cut into thin strips
1 cup mint leaves, shred into individual leaves
1 cucumber, cut into thin strips
1 cup bean sprouts or shredded lettuce leaves
3 Tbsp roasted rice powder (see tip)
2 tsp canola oil
3 Tbsp roasted peanuts, chopped
Seasonings for marinade:
1/3 cup soy sauce or 2 1/2 Tbsp dark mushroom soy sauce mixed with 2 1/2 Tbsp water
3 tsp sugar or 1 1/2 Tbsp Agave Nectar
1 tsp onion or or 'chicken' or mushroom broth powder
1/2 tsp ground black pepper
1/4 tsp good quality 5 spice powder
1 tsp sesame oil
1 stalk fresh lemongrass, chopped
Sweet and Sour Salad dressing:
1/3 cup water
1/3 cup fresh lemon/lime juice
3 to 4 Tbsp vegetarian fish sauce or Bragg's Liquid Amino
3 Tbsp Agave Nectar or 3 tsp sugar, or to taste
Notes: my husband don't like the sauce too sweet like in the restaurants so I made this sauce more in the sour taste.
1 tsp chili garlic sauce, sambal oelek or Korean red pepper powder, or less for less spicy
  1. If using dry TVP slices, simmer the dried veg protein in warm water for 20 to 30 minutes. Then, squeeze all the water out. Or, an alternative method which I like is to pressure cook the dry TVP slices in 3 or 4 cups water on high for 2 minutes. Then, use the quick release method. The TVP slices will be very soft. Let it cool and then squeeze the water out.
  2. If using soy curls, reconstitute them with 2 1/4 cups of hot water for 10 minutes. Then, squeeze the water out.
  3. Combine seasonings for marinade in a blender including the chopped fresh lemon grass stalk. Blend the sauce until well blended and the lemon grass is pulverized into very small bits.
  4. Mix the seasoning sauce with the veg protein (reconstituted tvp or soy cutlets) to marinade for at least 1 hour.
  5. Meanwhile, cook the rice noodles in a hot boiling water for 1 minute (or soba for 4 minutes). Take it off heat and soak for a few more minutes. Test if the noodle is soft. When the noodles are soft, drain it over a colander and rinse it with cold tap water so it will stop the cooking process.
  6. Heat your indoor bbq grill or a heavy skillet like a cast iron, high heat.
  7. Saute the marinated protein slices. Drizzle canola oil to prevent sticking. Cook until they are brown and looked like they have been barbequed. I use an indoor BBQ grill with less oil.
  8. Remove from heat. Add 3 Tbsp of roasted rice powder and mix well. Serve in a bowl on top of the drained rice noodle or soba and vegetables with Sweet and Sour dressing on the side. Sprinkle the roasted chopped peanuts on top
Nutrition Facts
Nutrition (per serving): 460.1 calories; 11% calories from fat; 5.9g total fat; 0.0mg cholesterol; 1499.5mg sodium; 475.2mg potassium; 84.3g carbohydrates; 2.3g fiber; 13.9g sugar; 82.0g net carbs; 25.4g protein; 9.2 points.
Cooking Tips for Roasted Rice Powder: Dry fry rice on cast iron pan in medium heat until rice became opaque and light brown, about 5 minutes. Let it cool. Grind in a mini blender or a spice grinder until it becomes a powder.


Vegan Vietnamese Young Jackfruit Salad
This young jackfruit salad is served at a vegetarian Vietnamese restaurant near my house. It is sour, a bit sweet, and spicy like Thai Somtum (young papaya salad). It is served on top of Vietnamese sesame chips that are available in Vietnamese markets but it can be substituted with Indian pappadums. Originally, it is made with fish sauce but I am able to substitute is with vegetarian fish sauce. Bragg's Liquid Amino tastes similar to vegetarian fish sauce and can be used for this dish. With drizzles of Sriracha hot sauce, roasted peanuts, squeezed lime wedges, and chopped cilantro, this dish is crunchy, delicious, and refreshing.
Servings: 6
Printable Recipe

Ingredients:
2 cans young jackfruit in brine (each can is 8 oz drained weight, total = 1lb.), drained,rinse in water, squeeze out the water and cut into strips (vertically according to its grain)
2 tsp. canola oil
4 cloves garlic, minced
3/4 cup shallots or green onions, chopped
1 cup Thai/Vietnamese basil, loosely packed, chopped
1 tsp. sea salt
1/2 tsp. black pepper
1 Tbsp. vegan sugar
2 1/2 Tbsp. Vegetarian Fish Sauce or Bragg's Liquid Amino
1 to 2 Tbsp. fresh lemon juice
1 tsp dulse granules
Serve with:
1/4 cup roasted peanuts, chopped
1/4 cup cilantro, chopped
1/4 cup Thai/Vietnamese basil, chopped, optional
Fresh lime wedges, Sriracha hot sauce, Vietnamese sesame chips or Indian Pappadum
  1. Preheat wok. When the wok is hot, add oil, garlic, and onion. Stir fry until fragrant. Add young jackfruit strips, salt, sugar, black pepper, and vegetarian fish sauce or liquid amino. Mix and stir-fry in high heat for 10 minutes until spices are absorbed to the jackfruit. Add water to the wok to prevent sticking.
  2. Add 1tsp. dulse granules, mix well. Stir fry for 2 minutes.
  3. Add lemon juice and Thai/Vietnamese basil. Mix well for 1 minute.
  4. Turn off heat. Set aside jackfruit in a bowl and let it cool.
  5. Serve the salad room temperature on a plate with chopped roasted peanut and chopped cilantro/basil sprinkled on top.
  6. Dot it with Sriracha hot sauce on top and all over the salad. Each person can use the sesame crackers/pappadum to scoop the salad, dot with fresh squeezed lime juice and more vegetarian fish sauce.
Nutrition Facts (without sesame crackers): (per serving): 157.3 calories; 26% calories from fat; 4.9g total fat; 0.0mg cholesterol; 484.9mg sodium; 424.8mg potassium; 28.3g carbohydrates; 2.6g fiber; 2.8g sugar; 25.7g net carbs; 4.0g protein; 3.0 points.